BREAKOUT BOARD INSTALLATION INSTRUCTIONS
This guide will take you through the installation of your Ender 3 S1 Breakout Board.
Important Safety Notes:
Power off and unplug your printer before working on electrical systems.
Never leave your printer running unattended.
Plugging things in incorrectly can damage your printer.
Ferrules are recommended for the Heater Cartridge Terminal Blocks.

MODDER BOARD 2nd Edition is Out Now!
New Features:
Same concept as the original Modder Board, featuring old-school connectors for all of your fans, stepper motors, thermistors, lights, heater cartridges, and more!
Latching 24-pin connector for easier installation
New “HF2” Port with Series Resistor for running select 12V Noctua Fans. Check this video for instructions for enabling the 12V HF2 Port (Soldering is Required)

INFORMATION BELOW IS FOR LAUNCH EDITION BOARDS ONLY
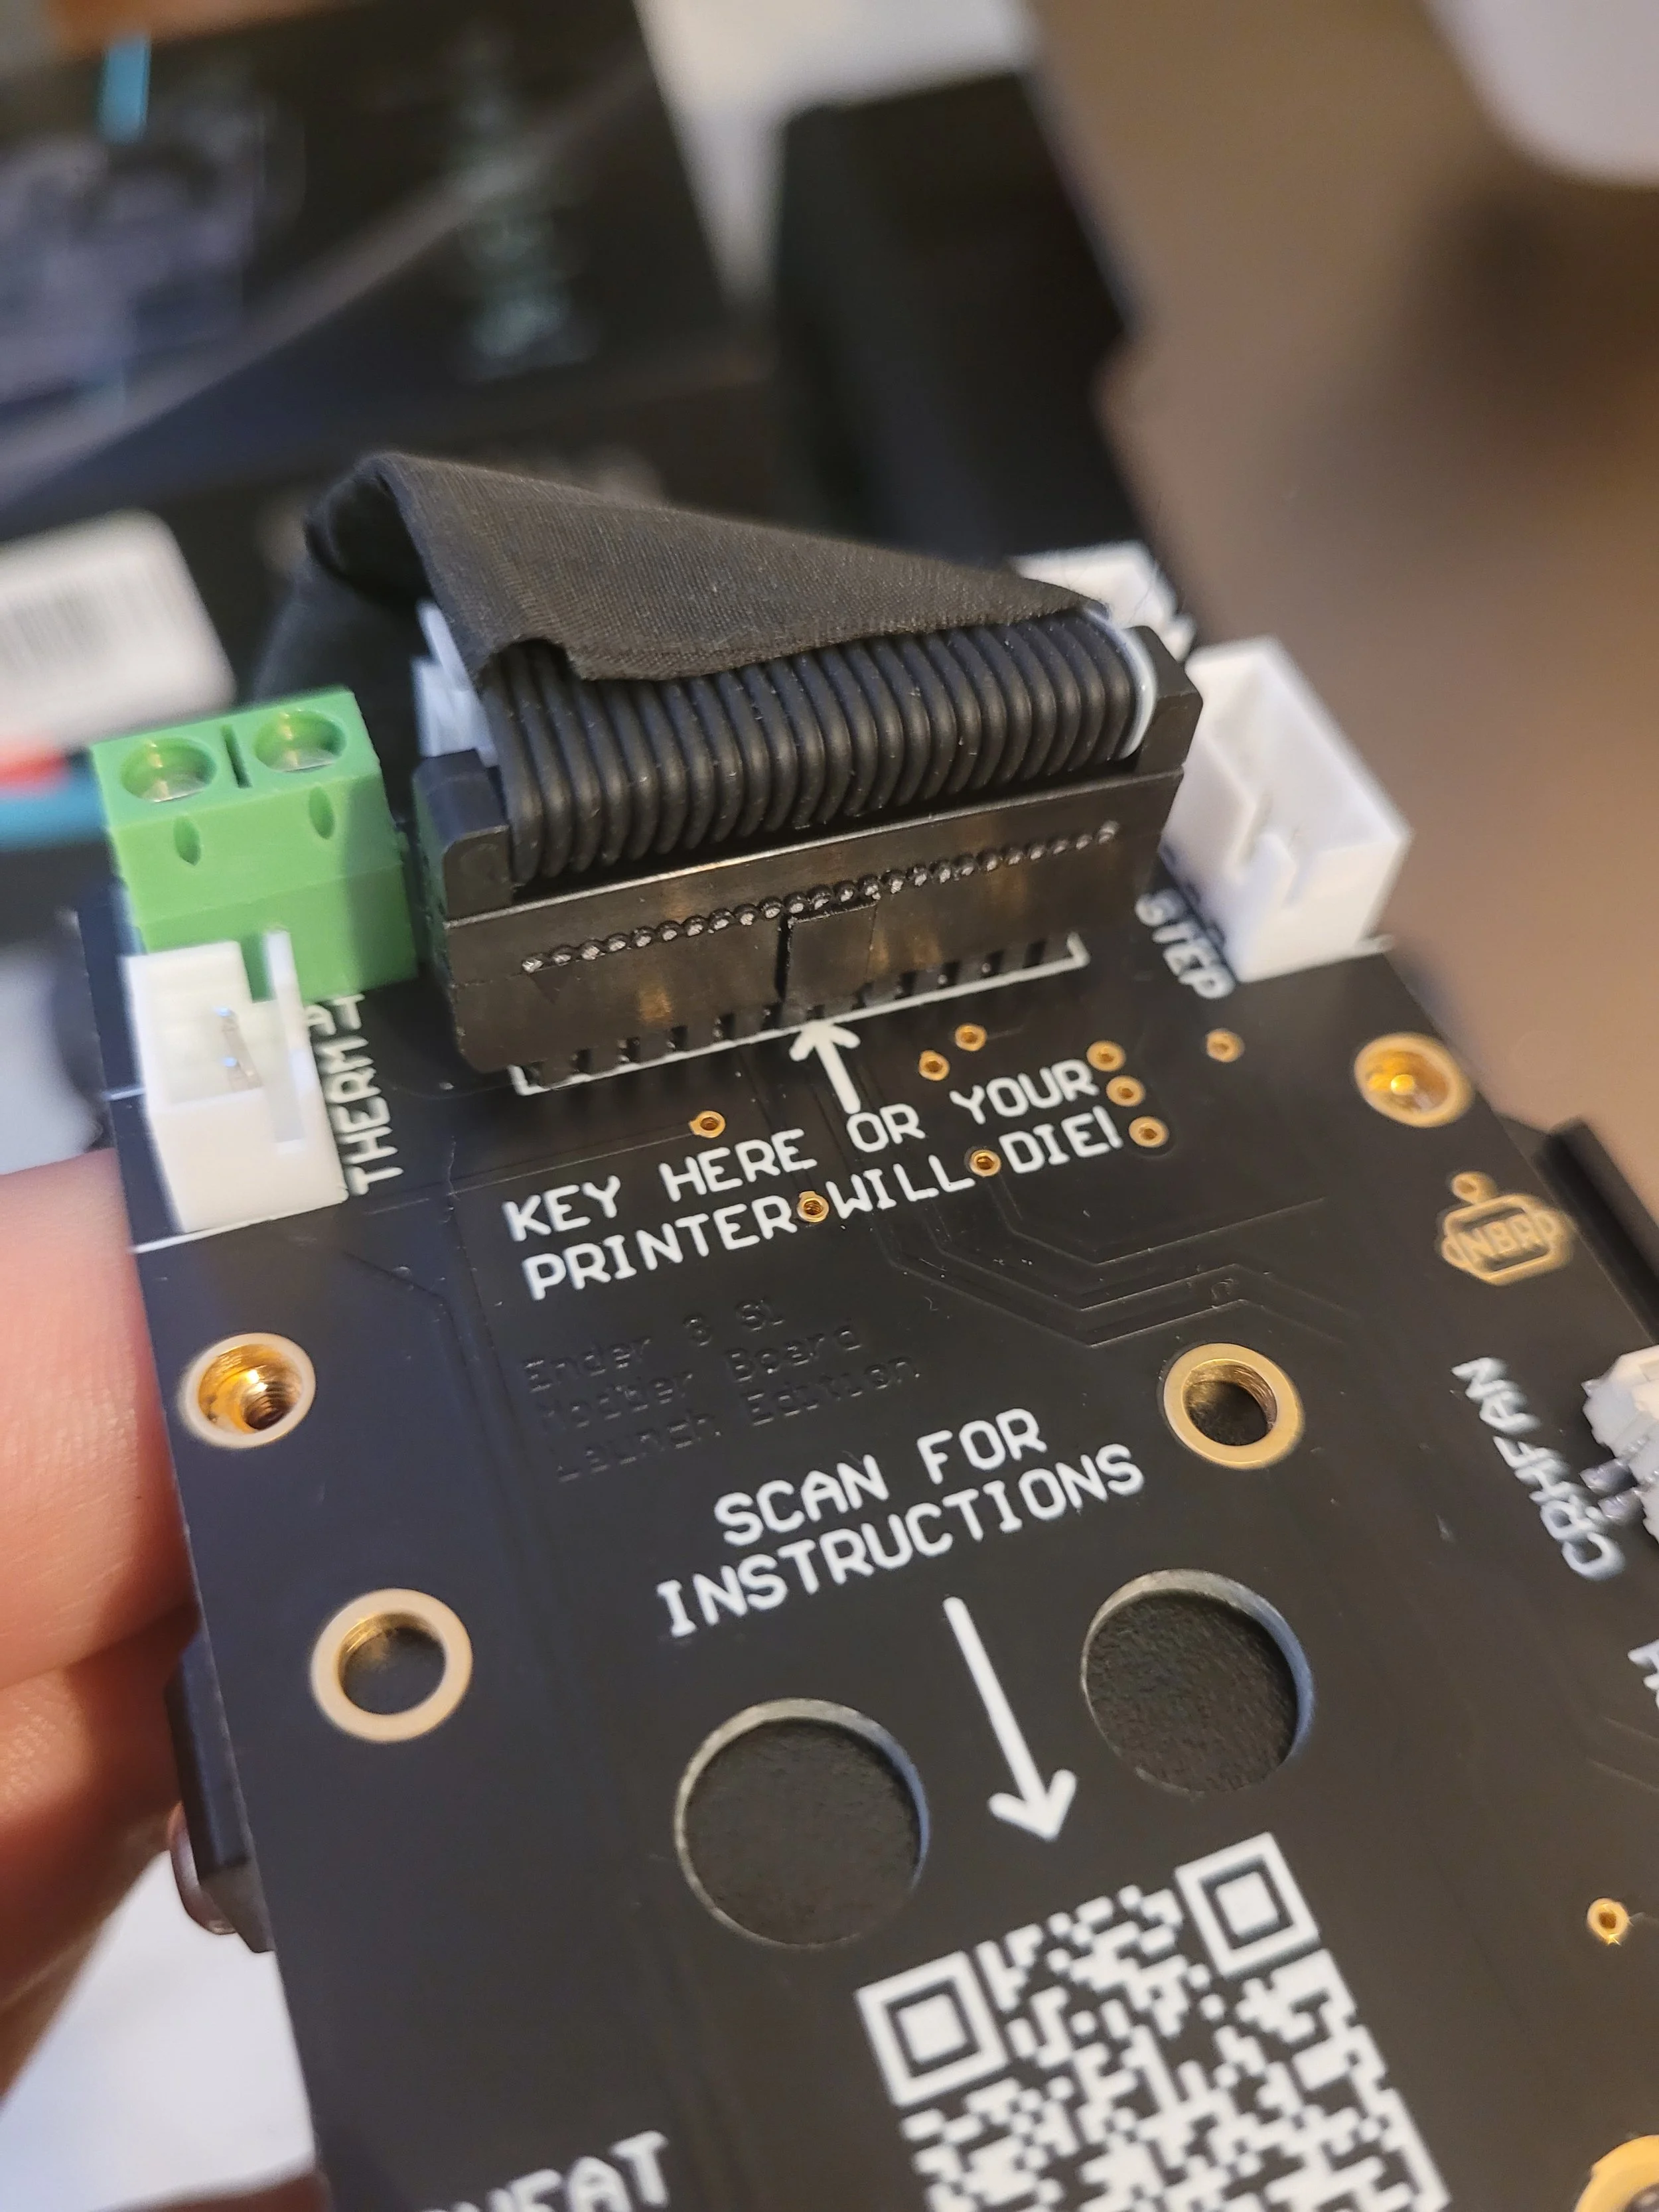
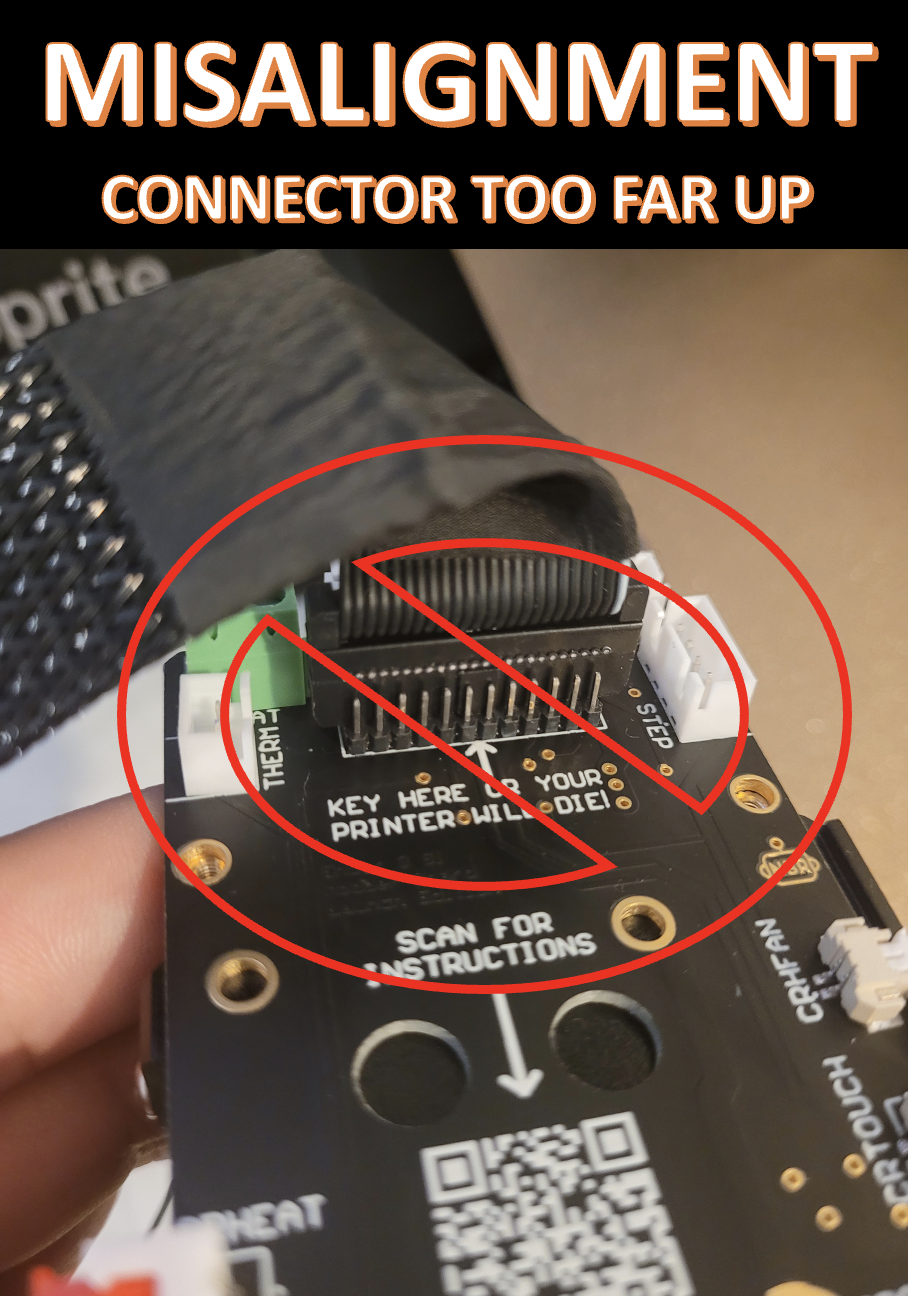
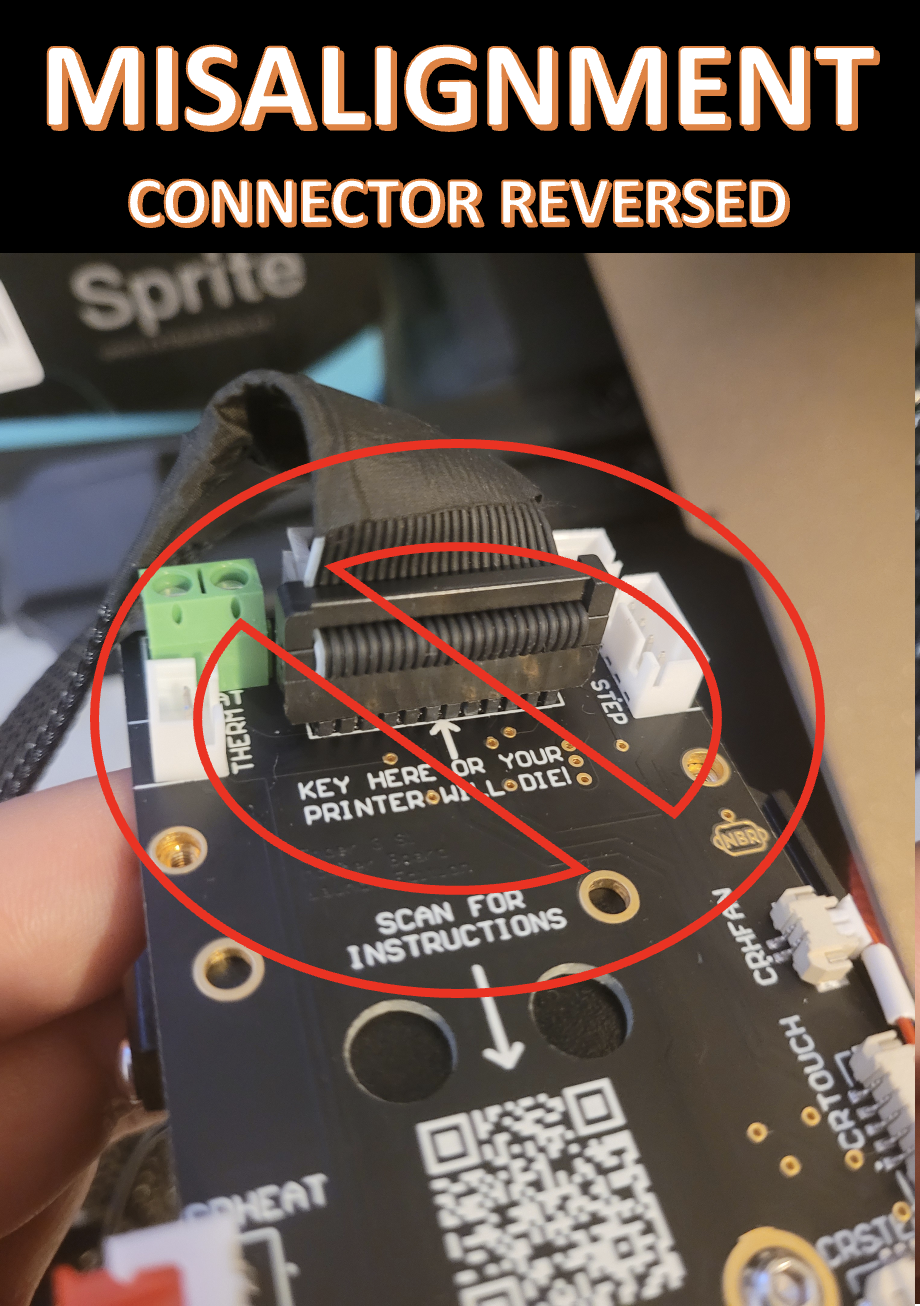
Installation: Proper Alignment Is KEY

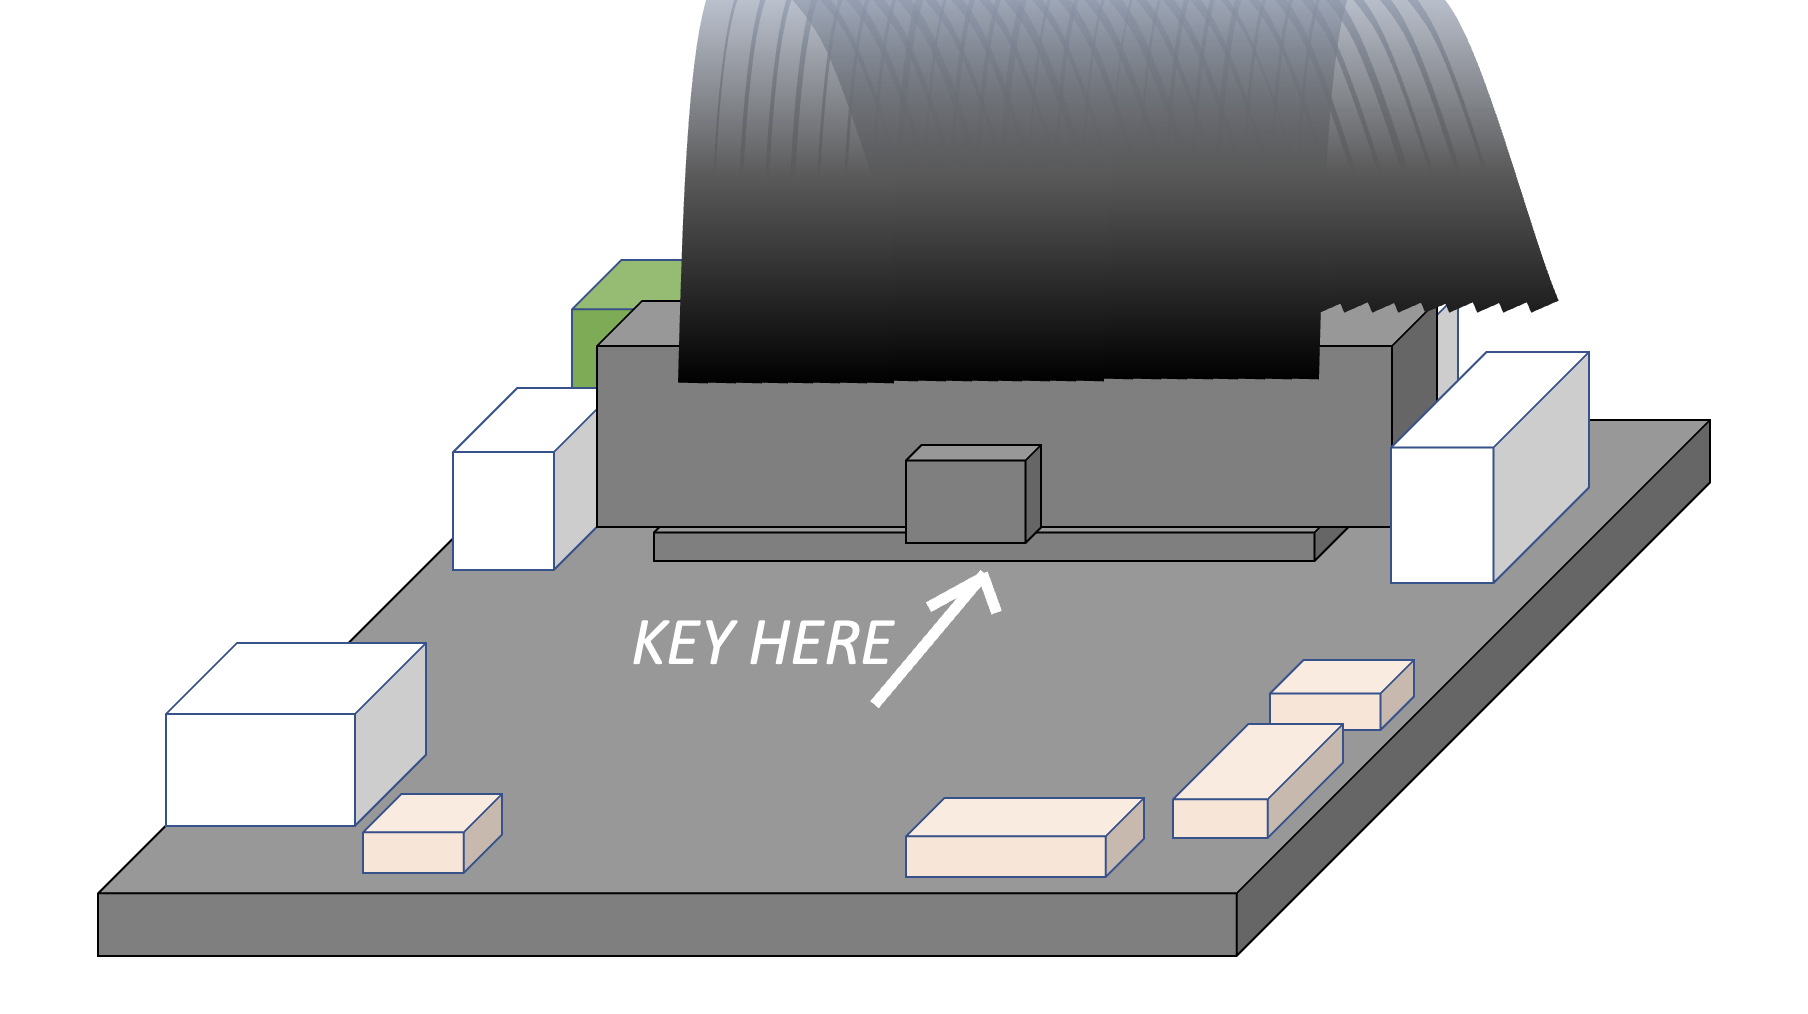
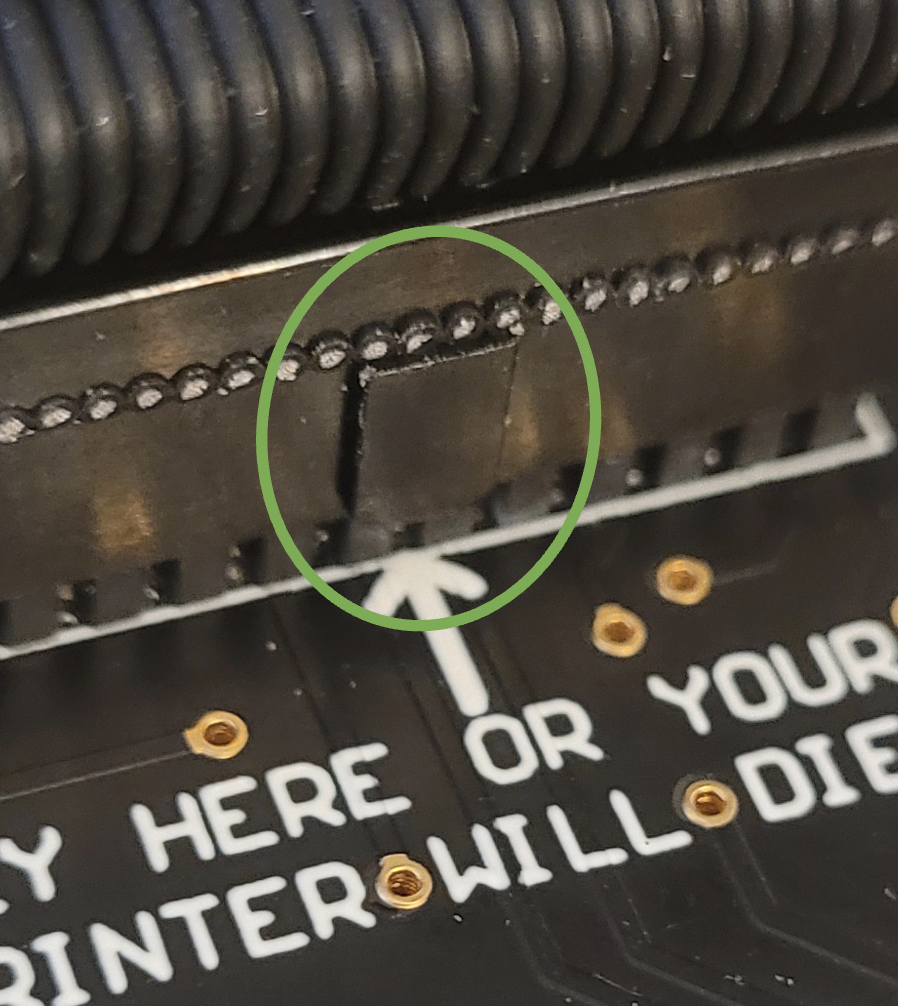
Good Alignment
SQUARE NOTCH IS VISIBLE ON BOTTOM
NO VISIBLE PINS ON TOP OR BOTTOM
-
![]()
Connector Too Far Up
-
![]()
Connector Reversed
-
![]()
Connector Too Far Down

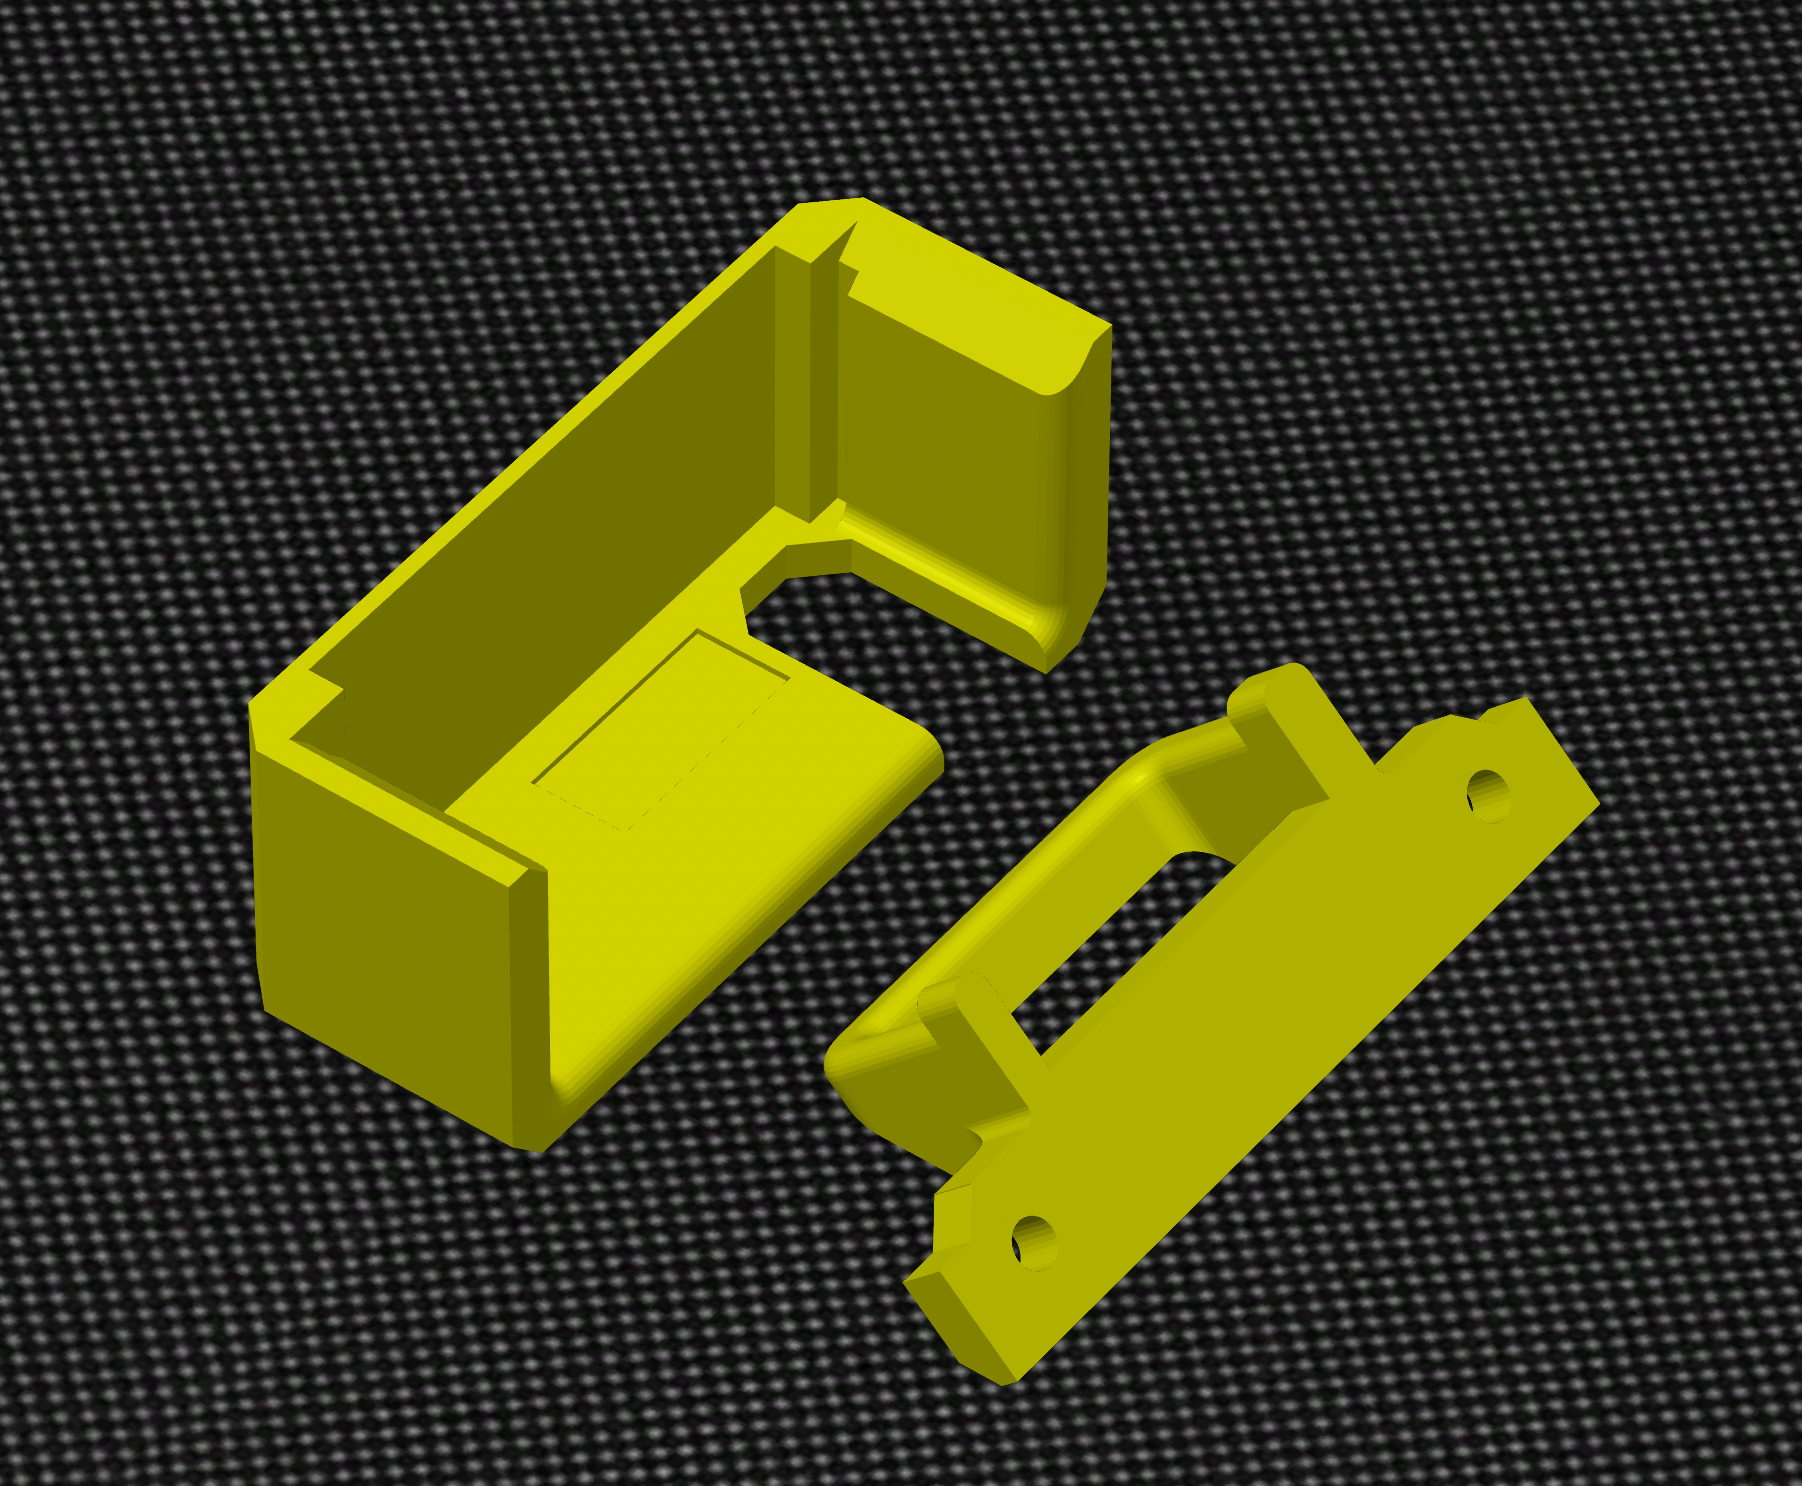
Connectors

Tips and Tricks:
Fan polarity may be reversed for “Part Cooling Fans” and “Hotend Fan” by removing the plastic guide from the fan pin, rotating it 180 degrees, and replacing it.
Extruder motor direction can be reversed by doing the same for the 4-Pin stepper motor input
Each connector has a nearby label that describes its function.
The Modder Board can be attached to the back of a standard stepper motor to.