Ender 3 S1 - Upgrades and Slicer Settings
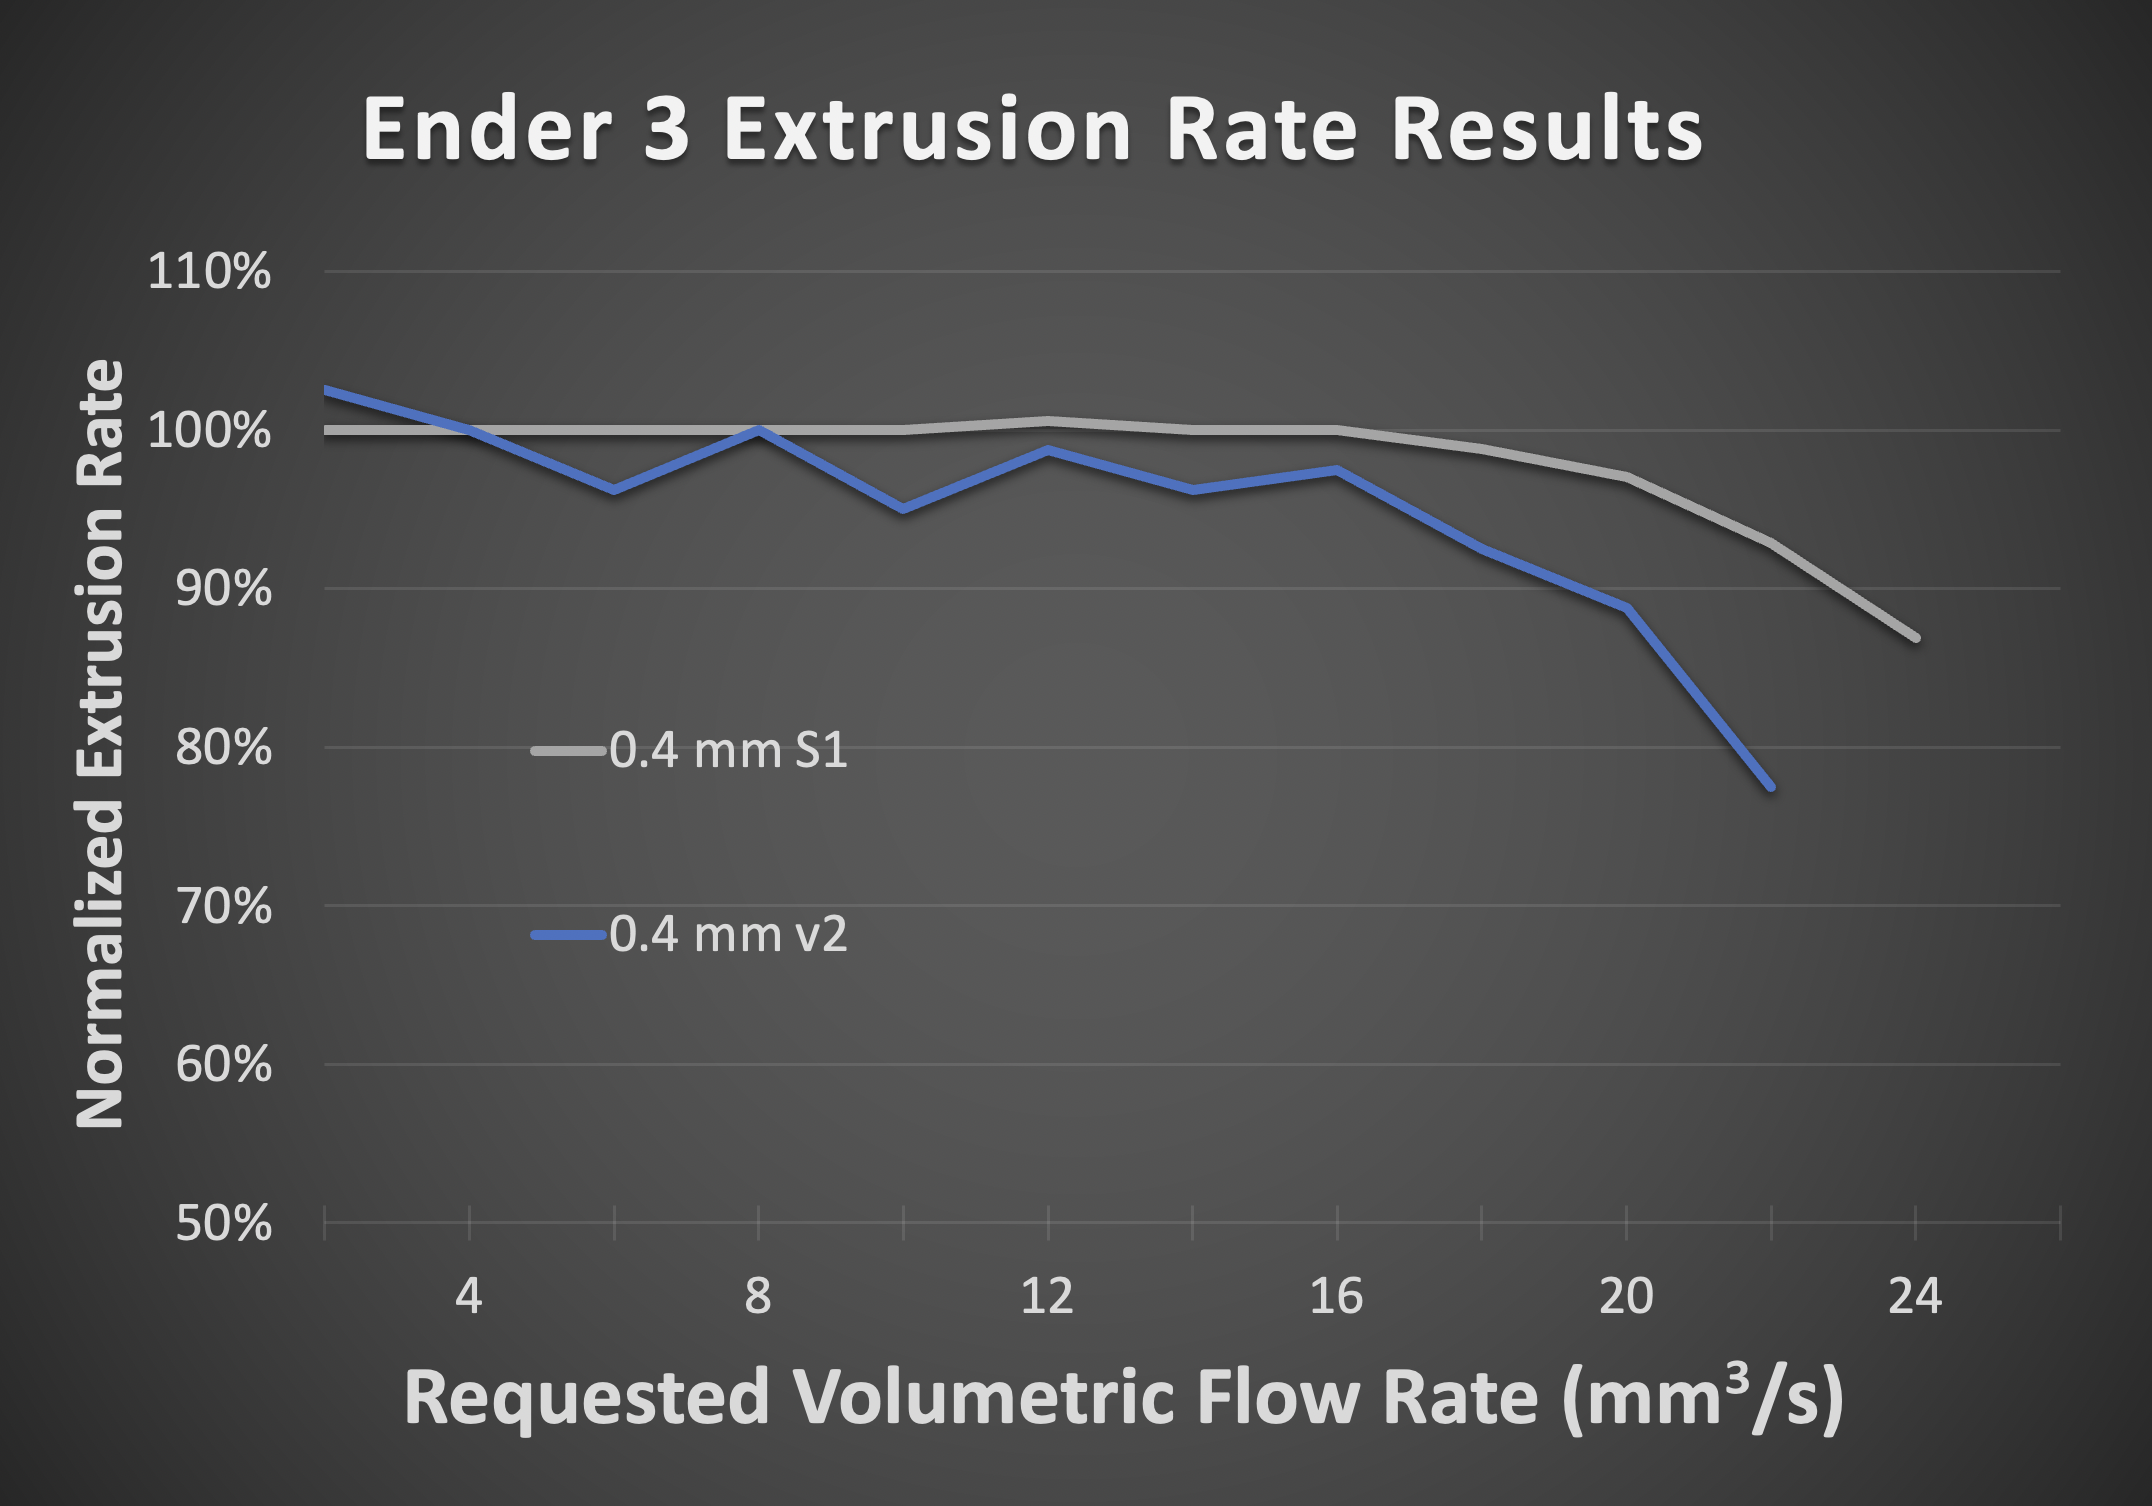
The Ender 3 S1 is a great upgrade over the prior Ender 3s. Lots of convenience features and a powerful direct drive extruder, so you can print at much higher speeds. Just take a look at this graph: It performs perfectly all the way up to 15 mm3/s. And it is super consistent compared to the old bowden type extruder. This consistency makes a big difference in print quality at higher speeds. At low speeds the S1 and V2 perform similarly, but the S1 still has an edge.
Test data from my Ender 3 S1 initial review
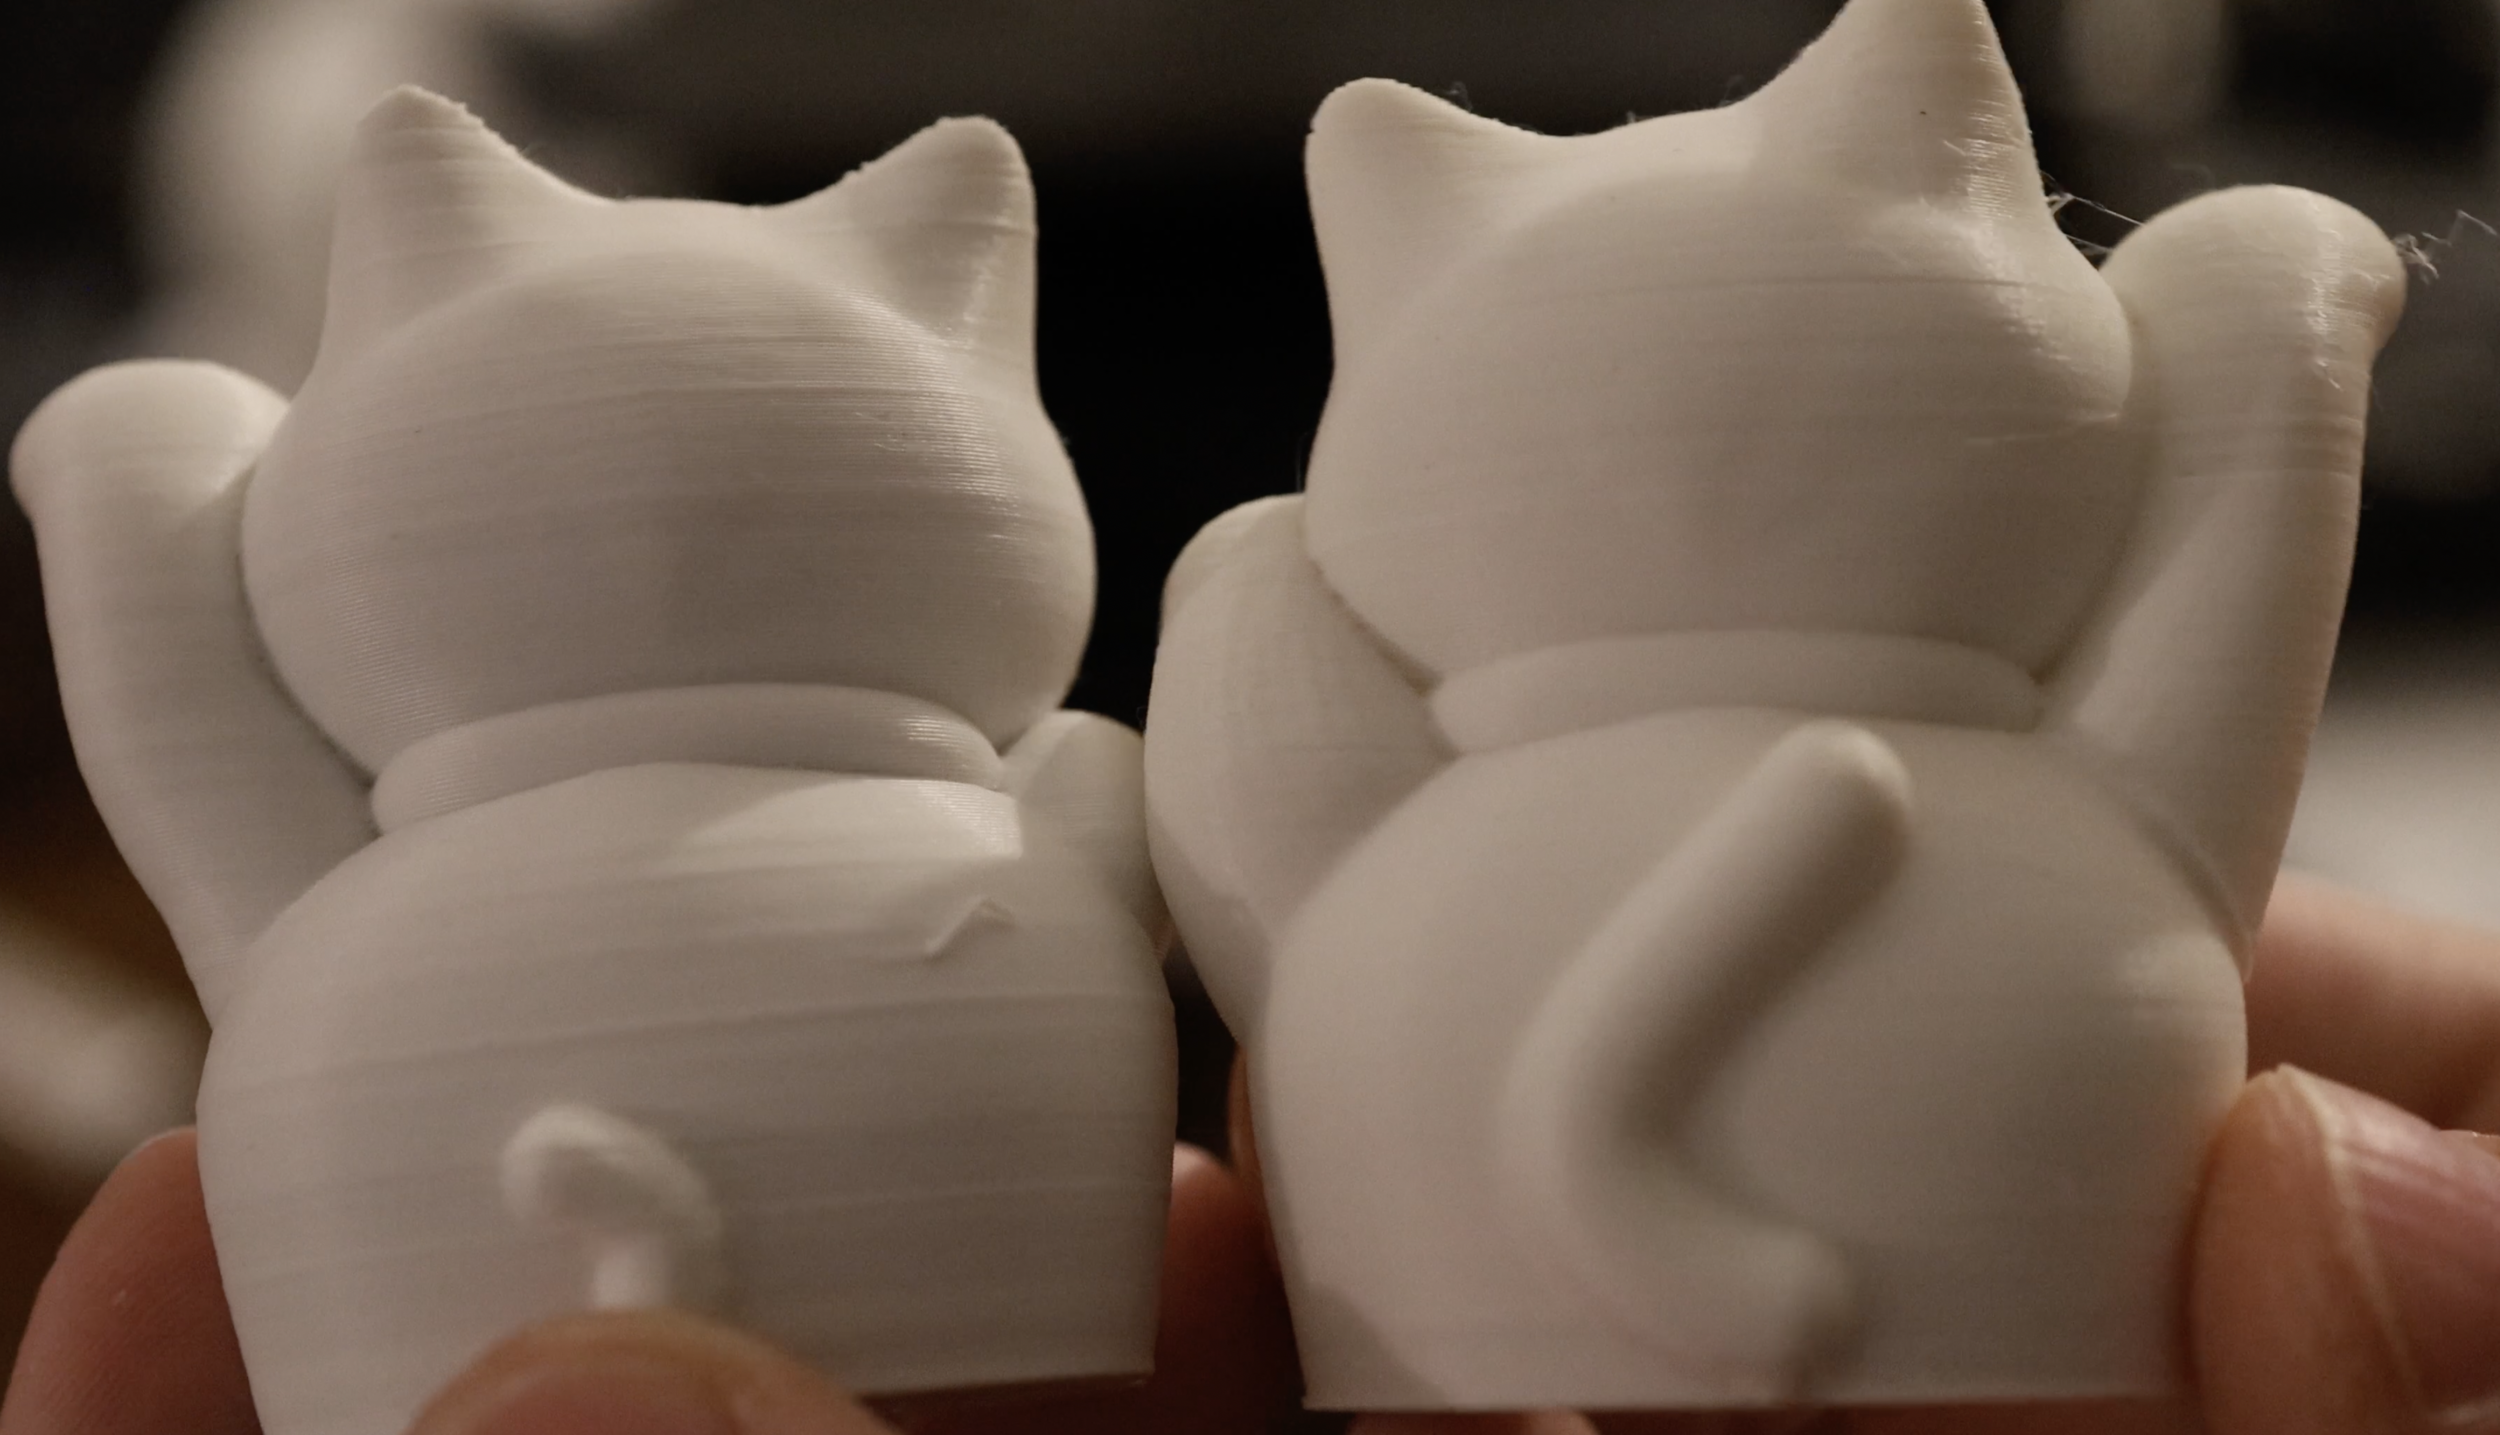
Ender 3 v2 Cat print is on the left, Ender 3 S1 is on the right. Which do you think looks better?
Bondtech CHT Upgrade
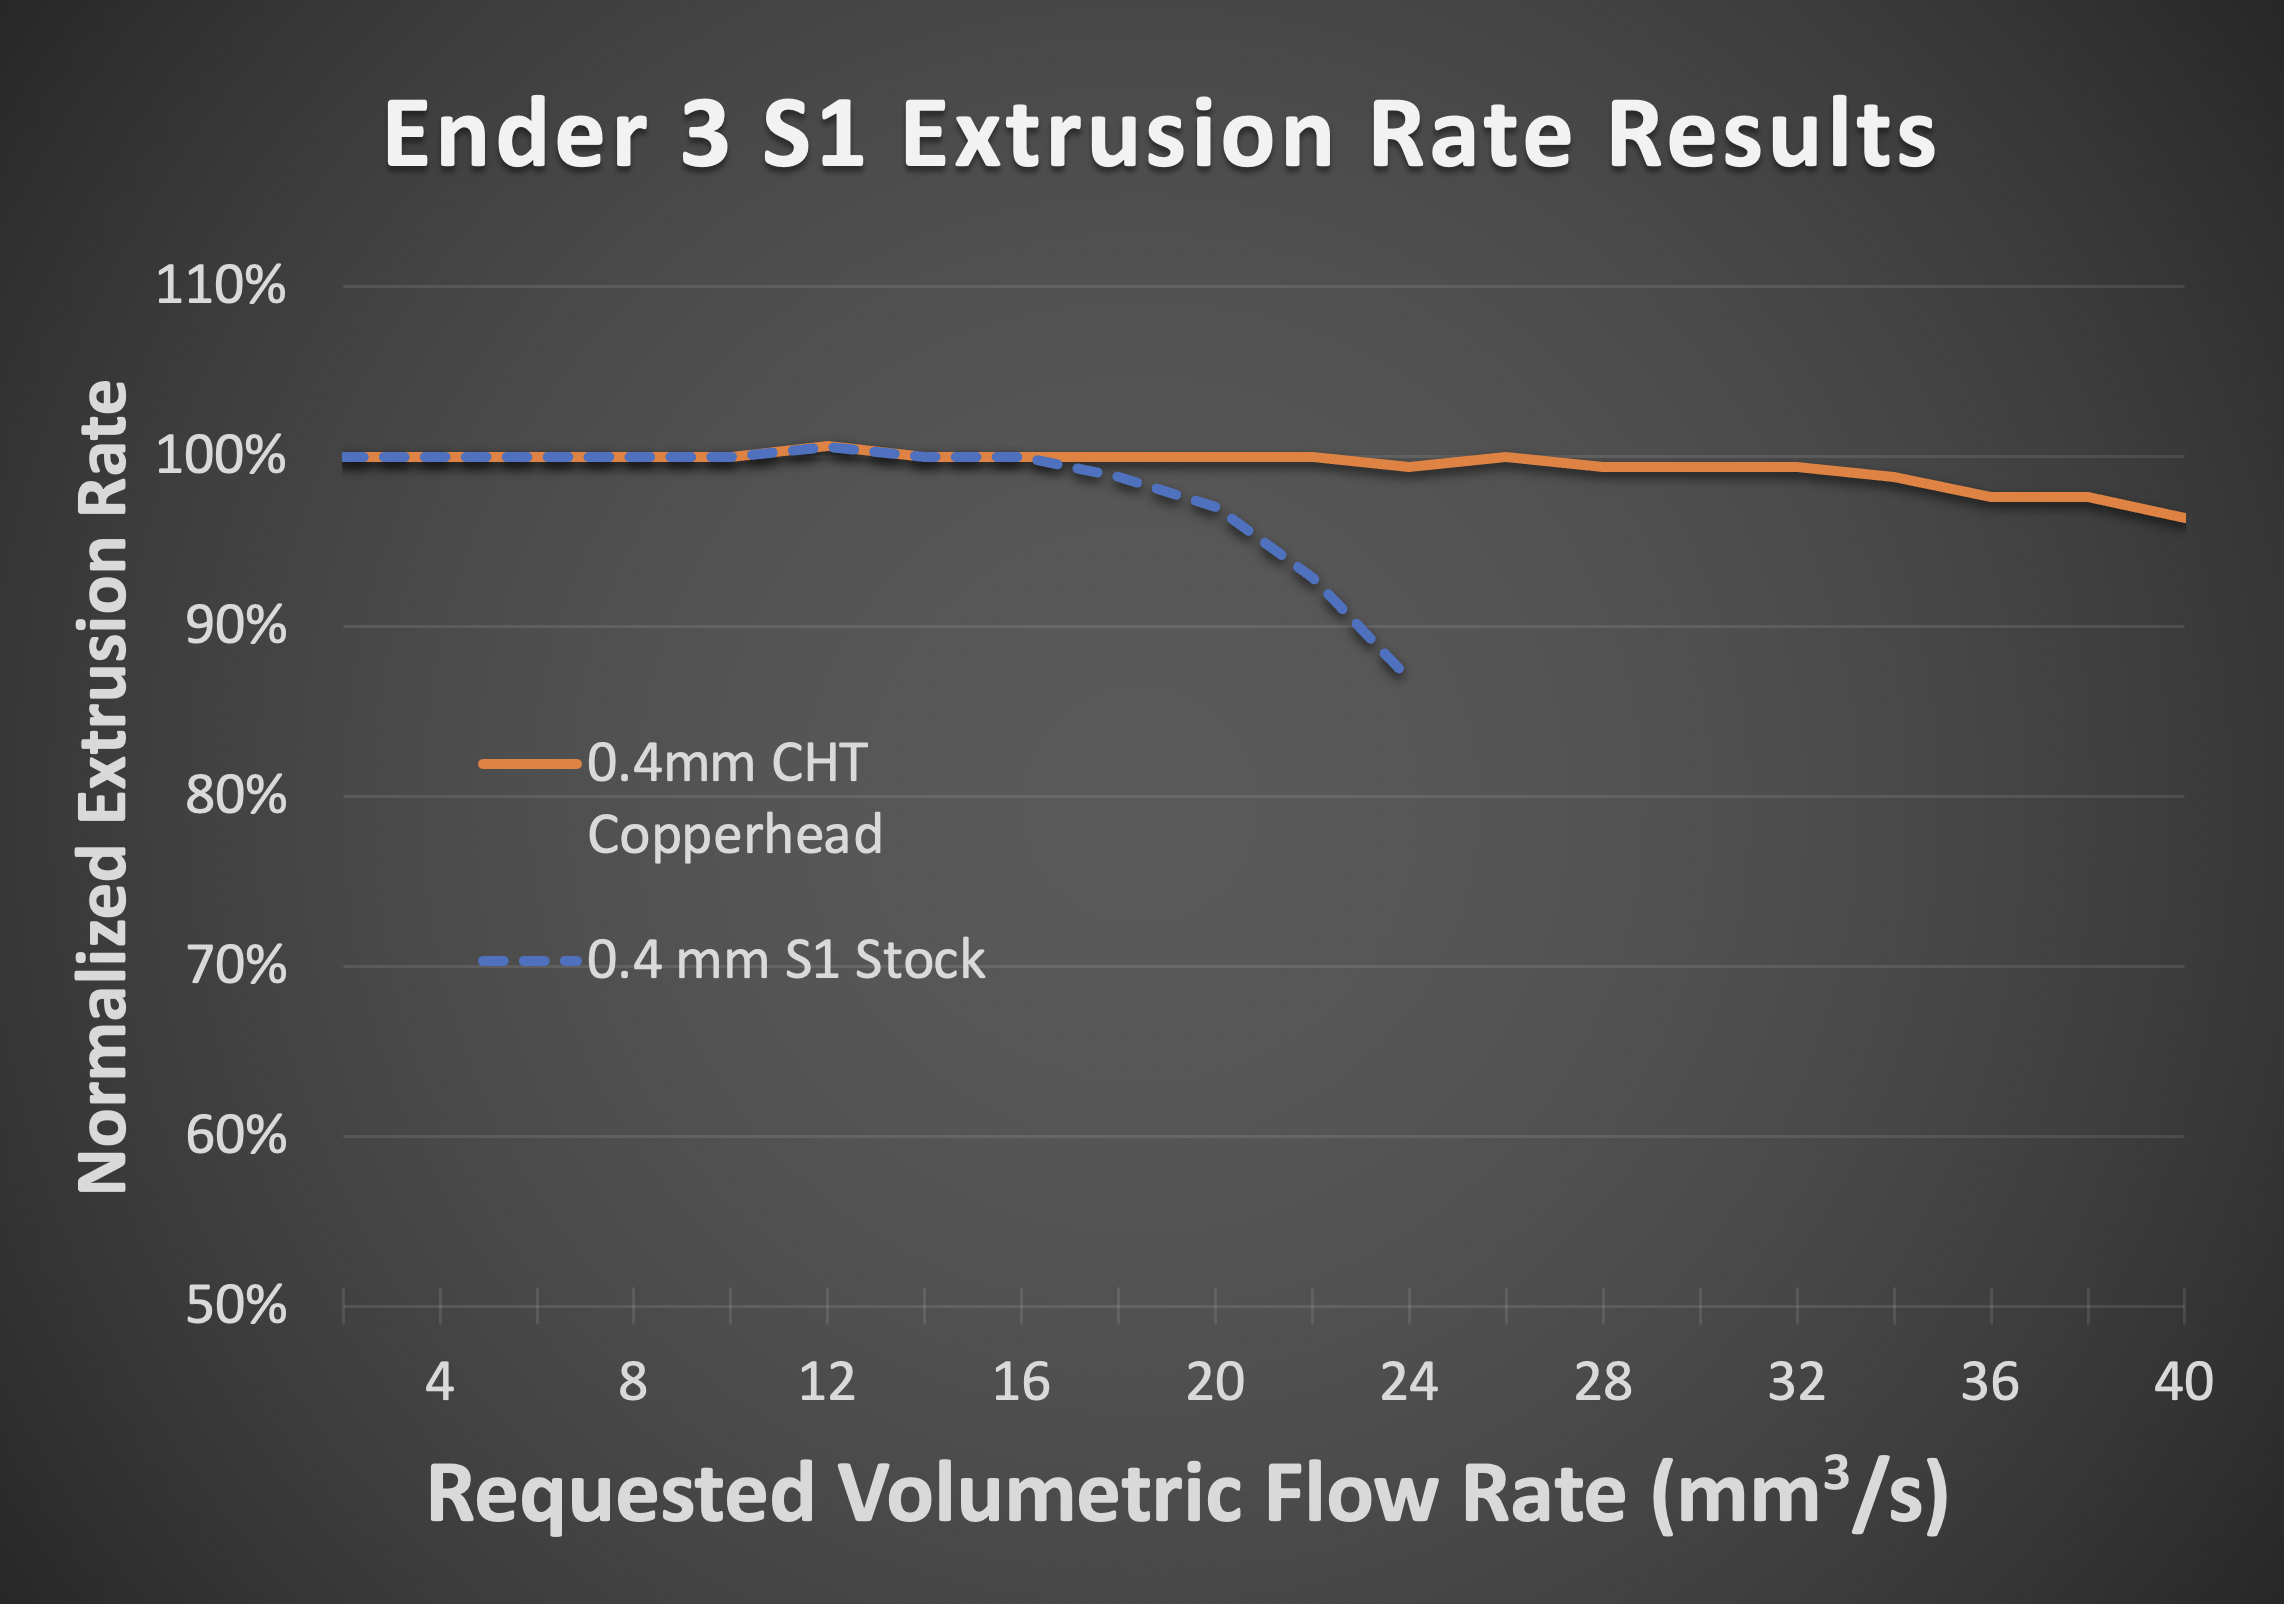
The S1 responds very well to the addition of a Bondtech CHT nozzle. This graph shows the increase in flow rate achieved using a 0.4mm CHT nozzle and a Slice Engineering Copperhead Heaterblock.
Test data from my video on Ender 3 S1 CHT and Hotend upgrade. The Stock “Sprite“ extruder holds up very well at high flow rates.
Overall I think I took a more difficult upgrade path than neccessary. It would be much easier to keep the stock heater block and just upgrade the heatbreak and nozzle. That way you wouldn’t need any special tools like crimpers or a soldering iron. I will be doing a “S1 Upgrade for Dummies“ episode soon, which will show an easier upgrade path.
Upgraded Fans
I upgraded all of the fans on my Ender 3 S1, now it almost completely silent, unless I crank up the part cooling fan. Check out the video I did on that topic, it is quite thorough. I am also sharing the printable bolt-on fan duct that I designed for this printer.
Ender 3 S1 Printer Profiles
A lot of people have been asking about my print profiles. Here are some step-by step instructions on how I set up PrusaSlicer to get great prints on the Ender 3 S1. To get started you will need to download and install PrusaSlicer.
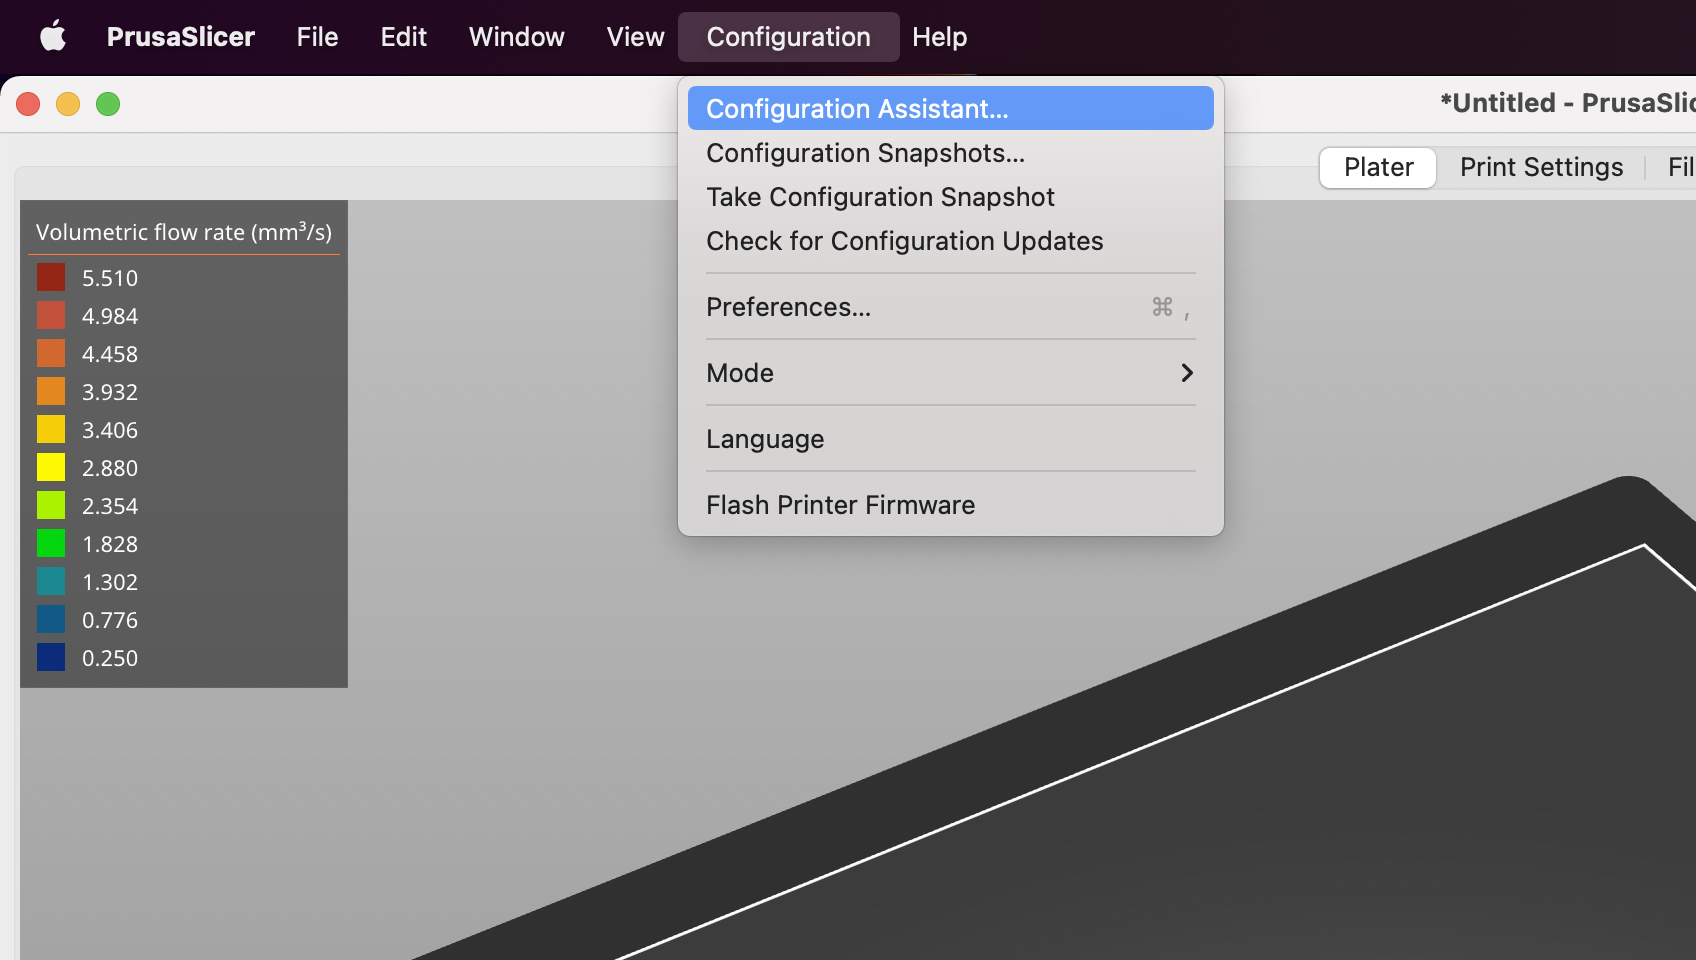
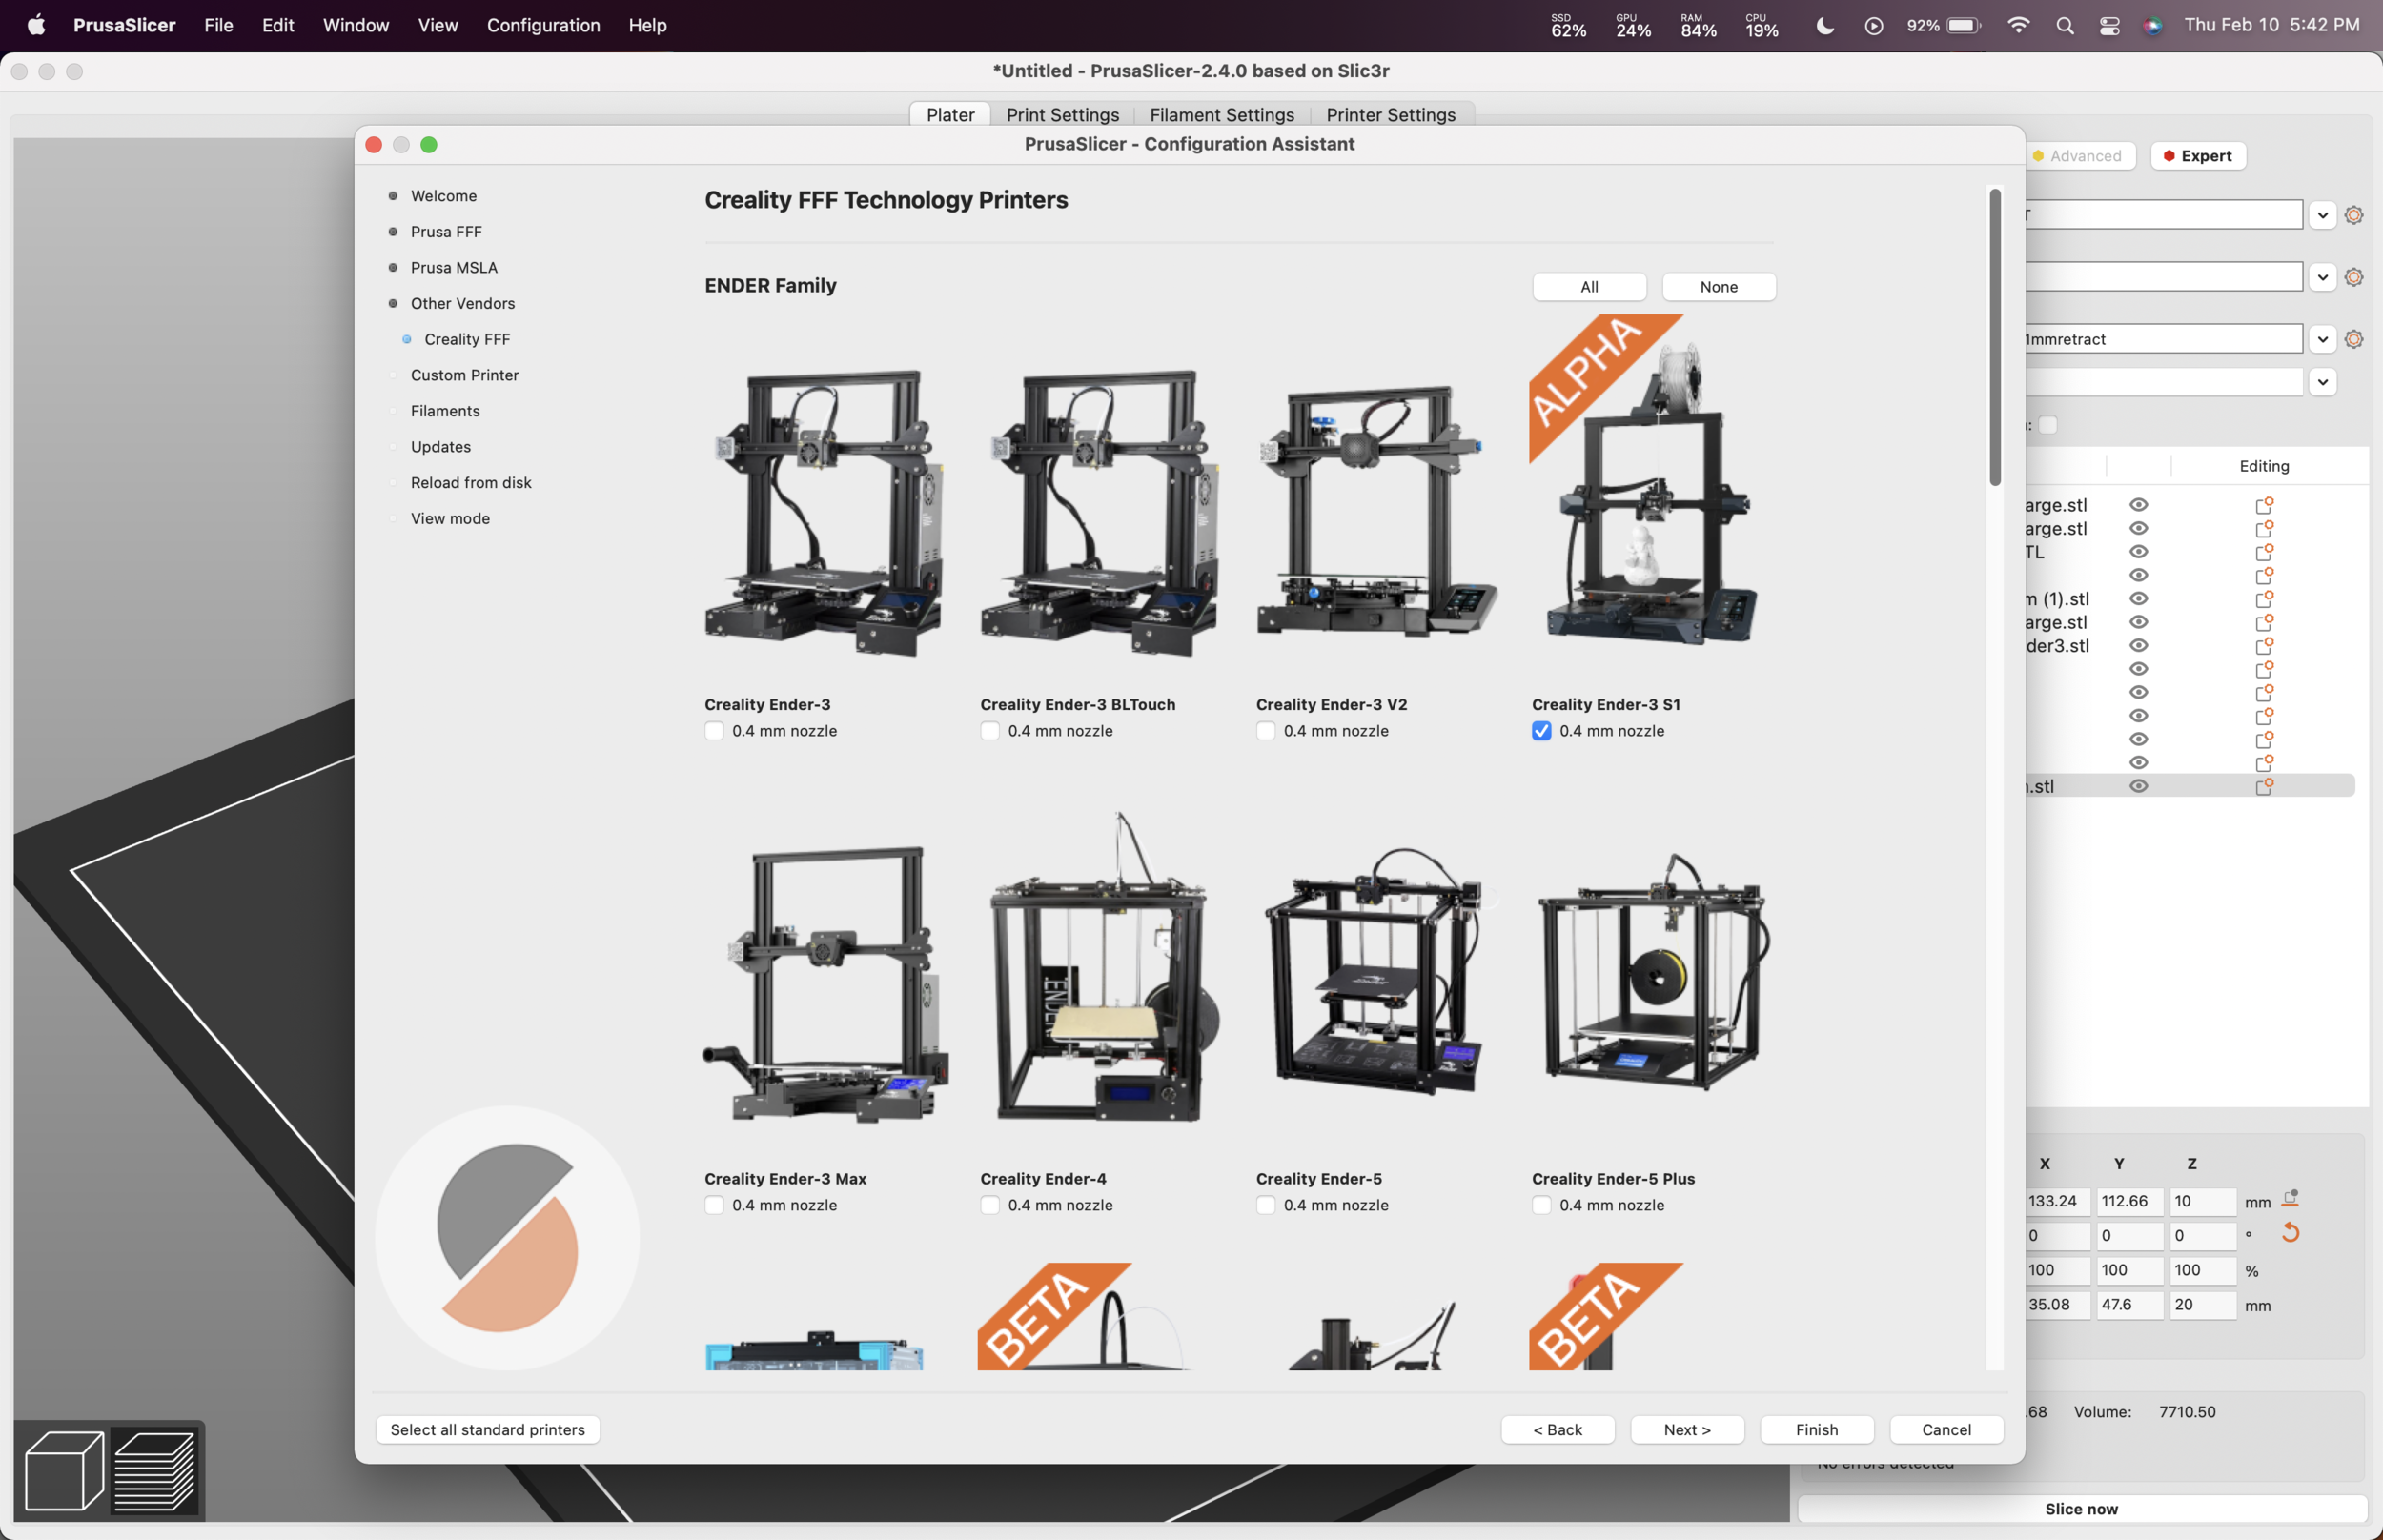
1) Open up the configuration Assistant. This will open automatically the first time you launch PrusaSlicer
2) Under “Other Vendors“, select “Creality FFF”, and you will see all of the Creality printers. Check the box for “Ender 3 S1” and then click “Finish“
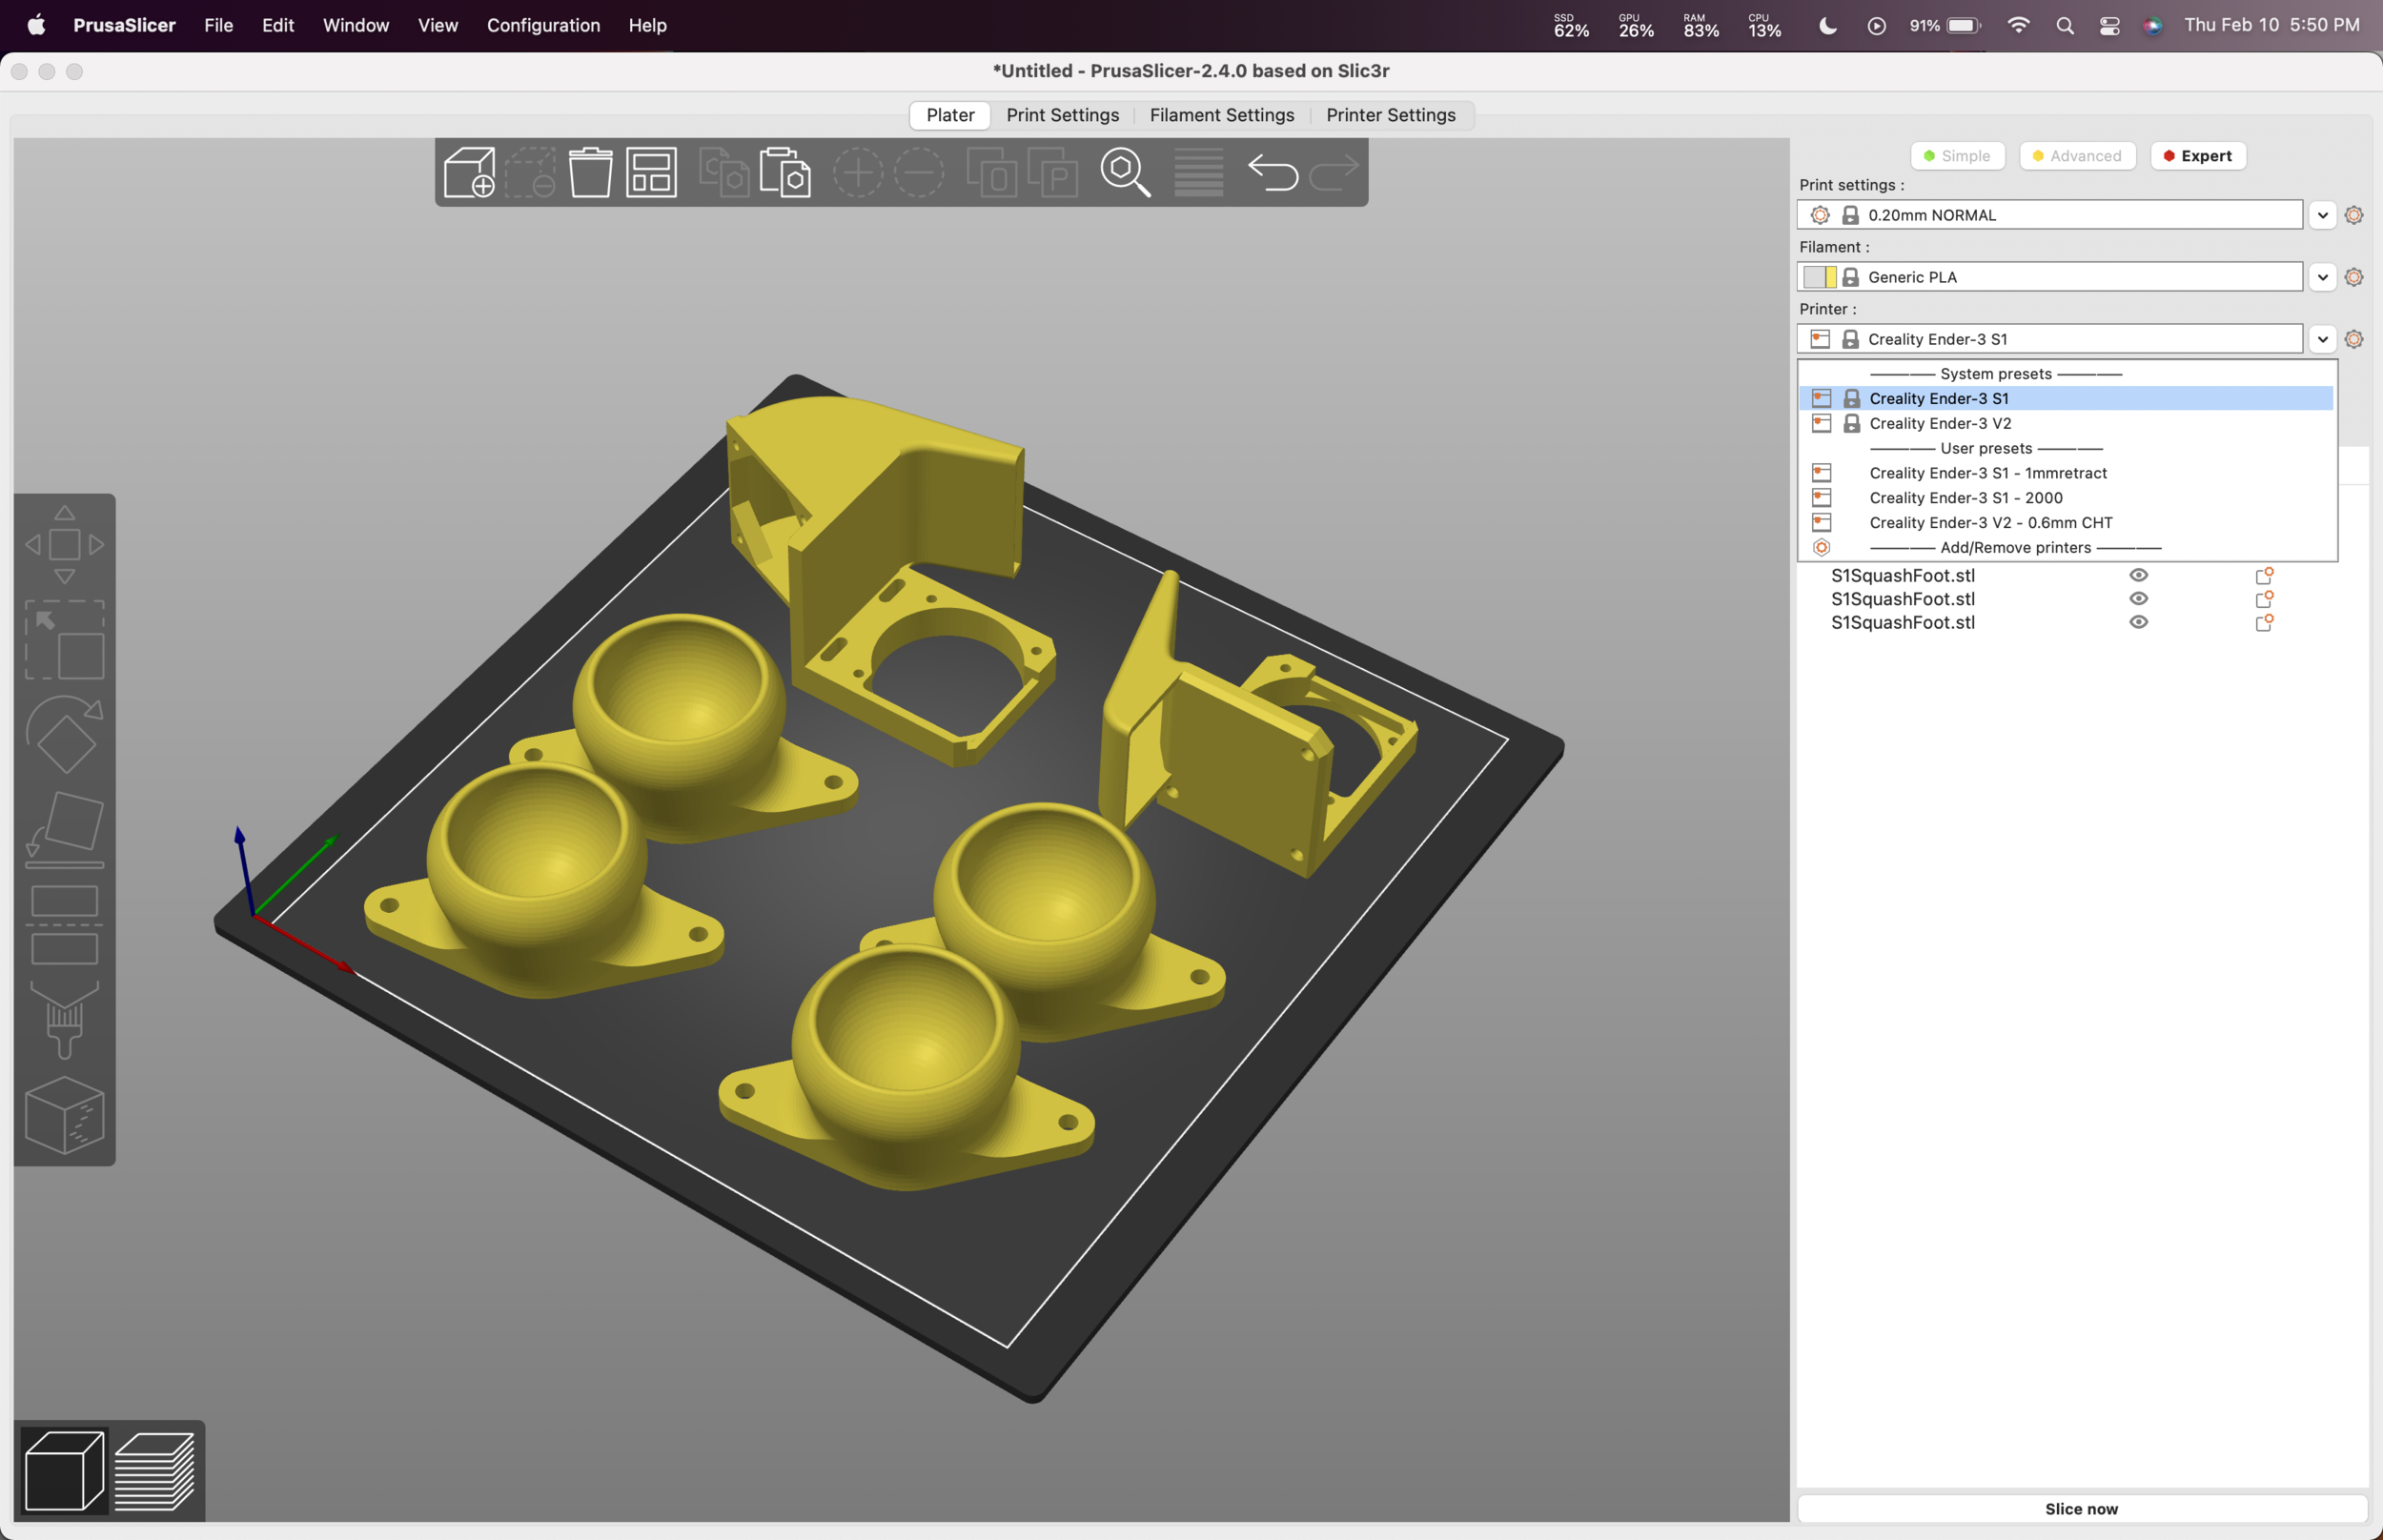
4) All of the stock profiles are great. I use “NORMAL” and “SUPERDRAFT” most often. Occasionally I will use a special profile I made for ultimate print speed. I call it “Stupid Fast“.
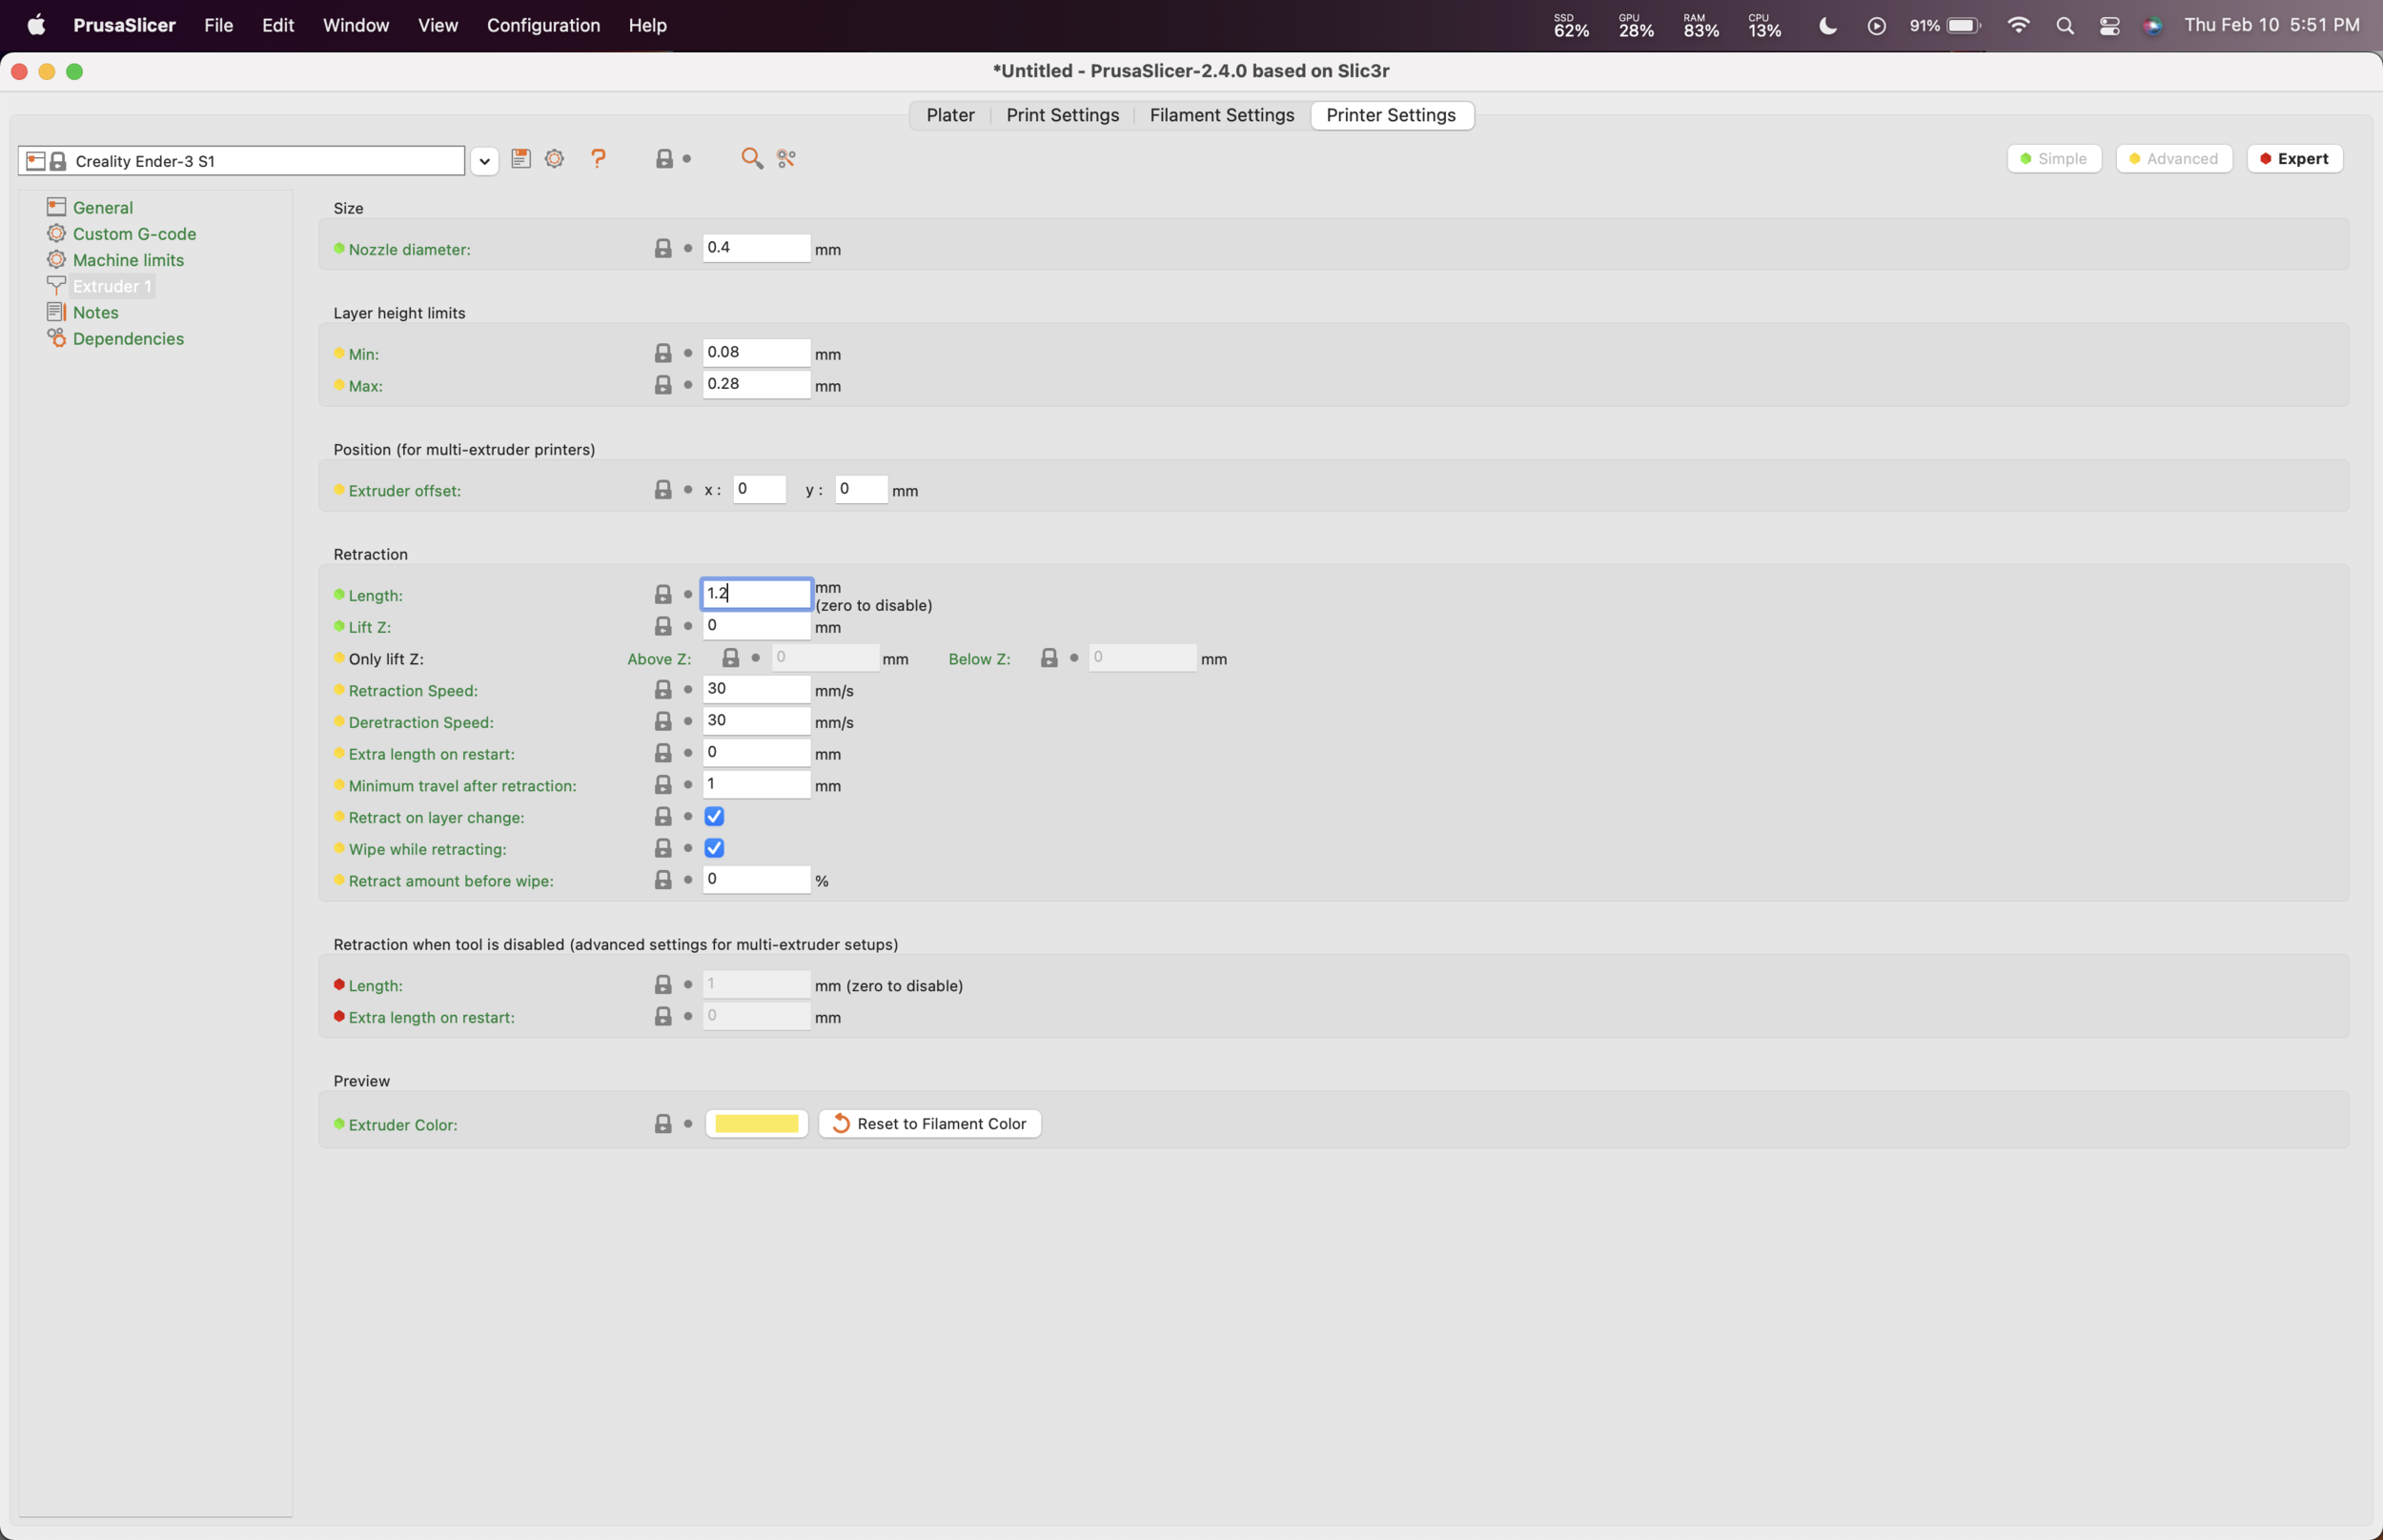
5) In the “Printer Settings” tab, go to “Extruder 1” and change the retraction setting to 1.2mm. Note that I have a bunch of extra settings on my screen because I enabled “Expert” mode in the top-right.
I had to increase this from the default setting (it was 0.8 at the time of writing), because it resulted in a small amount of stringing on my printer.
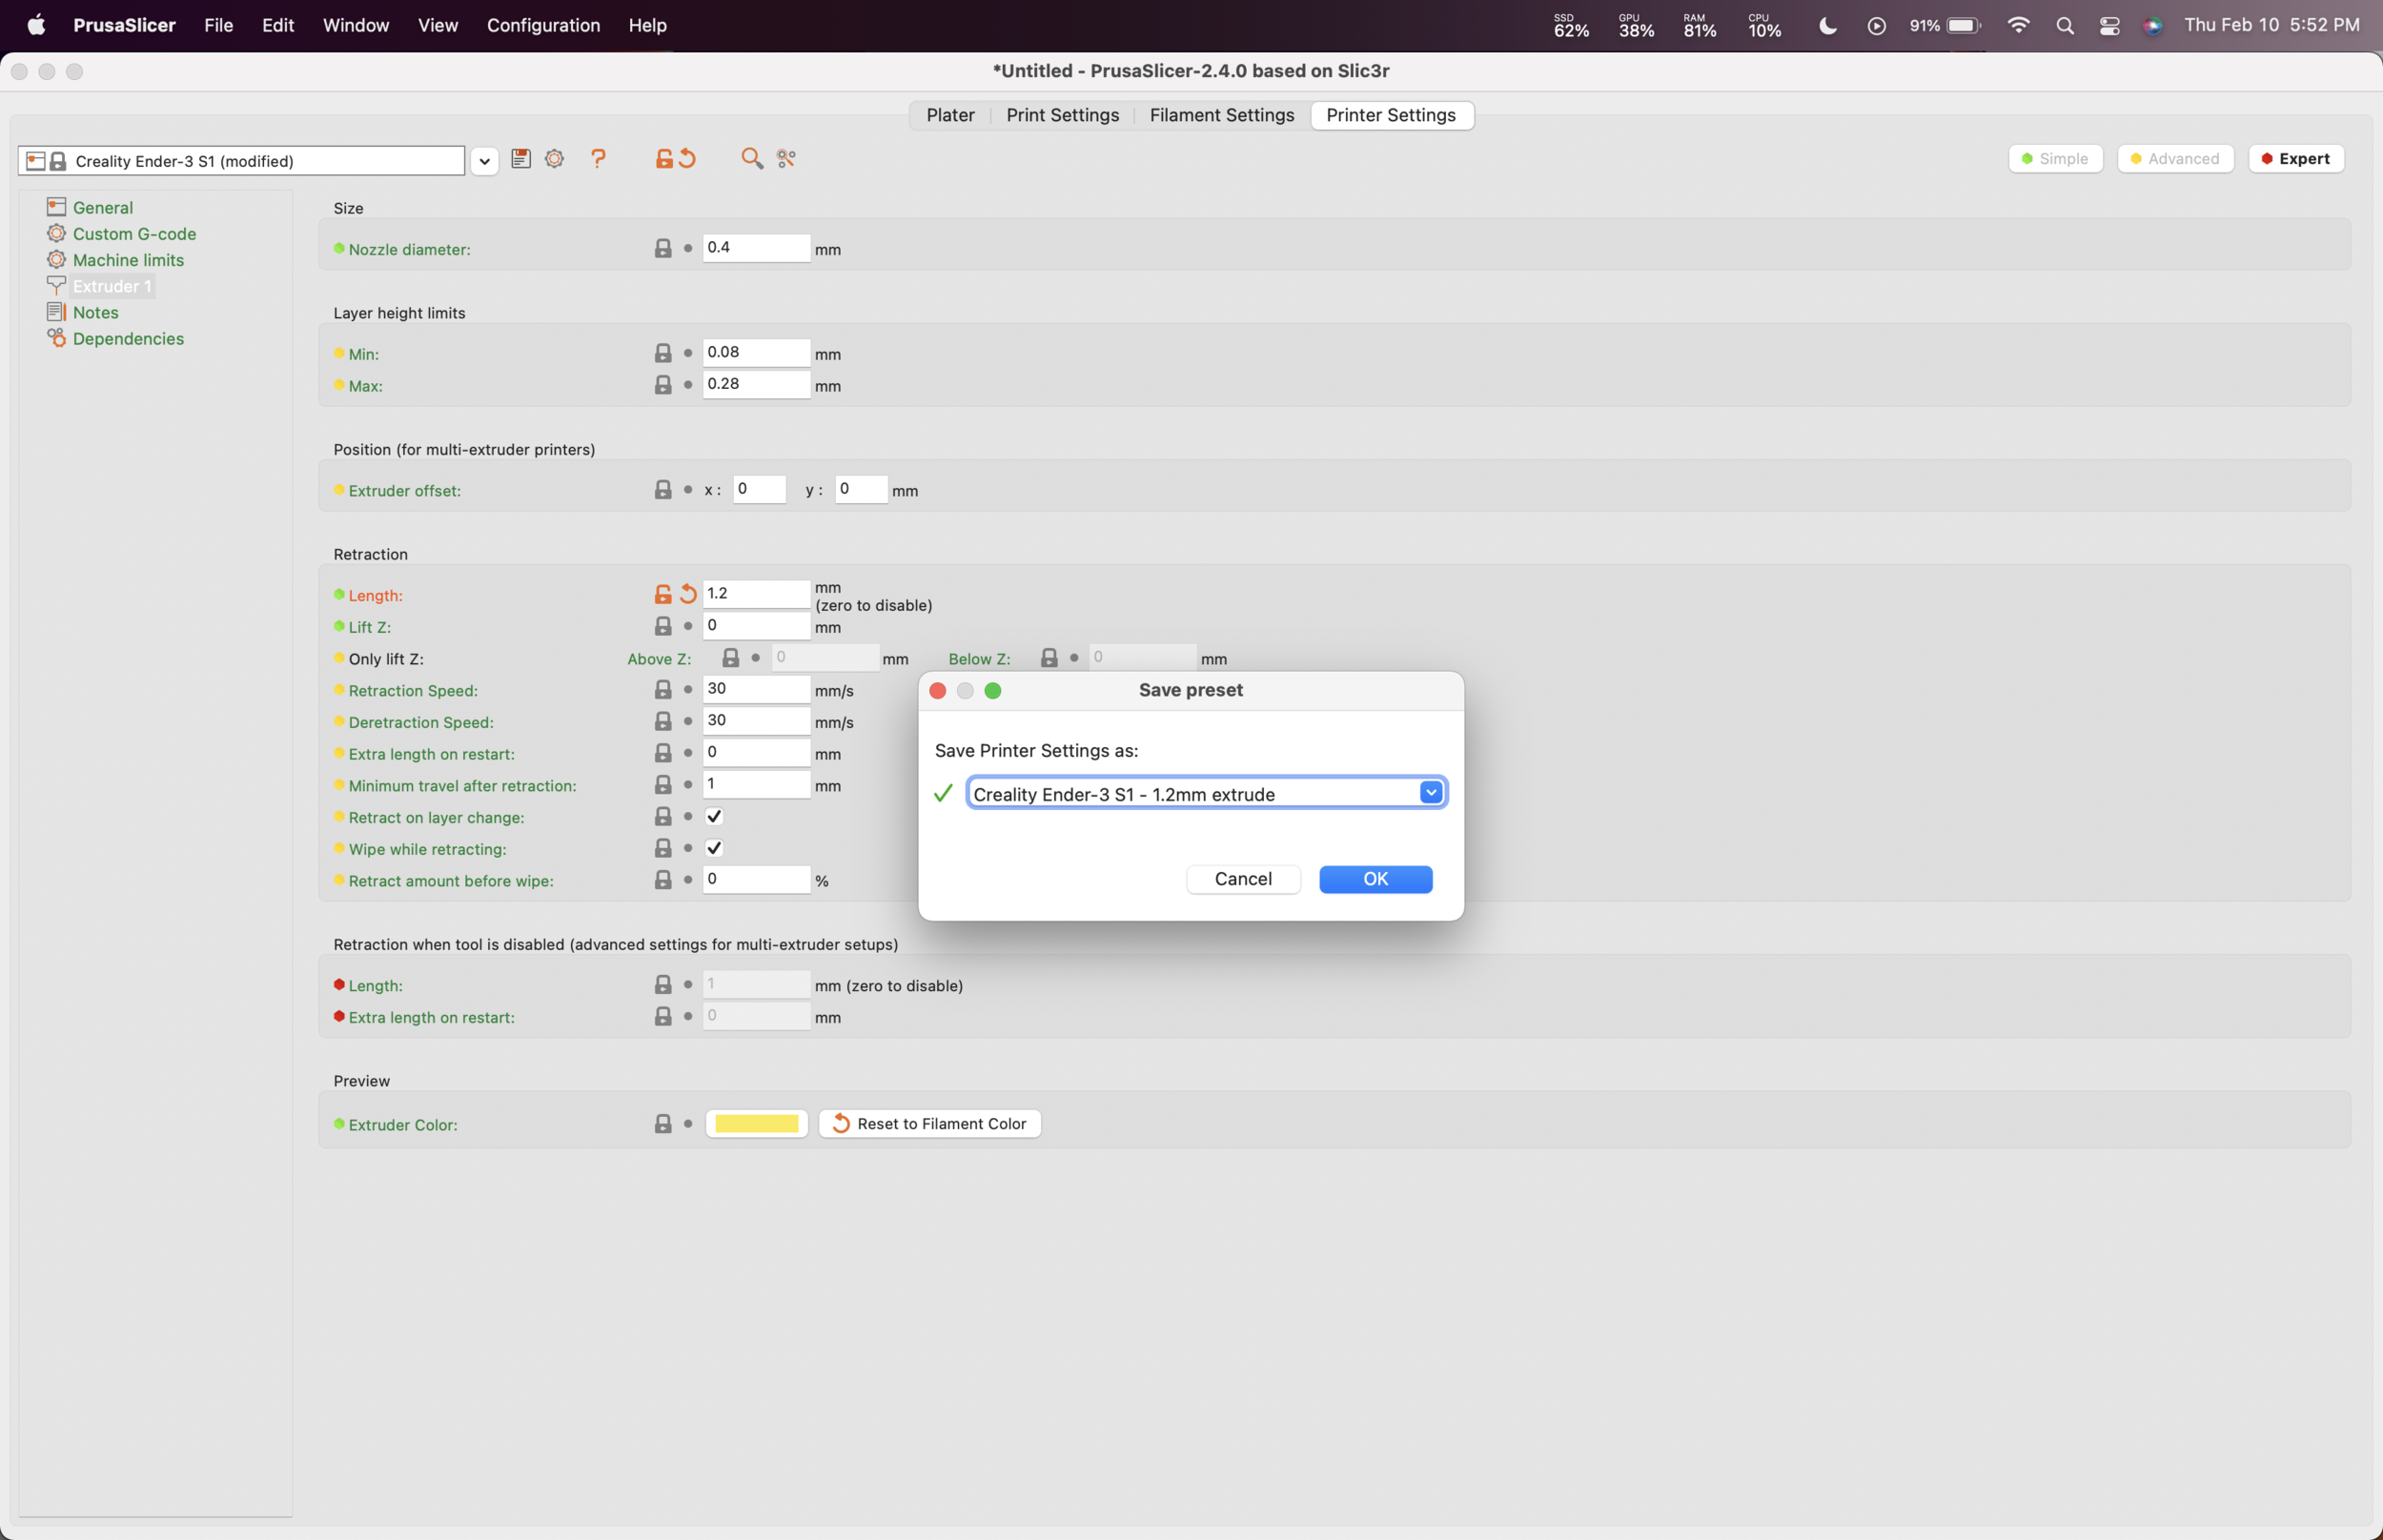
Save the printer setting using the little save icon to the right of where it says “Creality Ender-3 S1 (modified)“ and make sure to always use the 1.2mm retraction profile from now on!
Now you can use all of PrusaSlicer’s great built-in profiles!

